Black Cherry Jelly Recipe: A Luscious, Secret Twist Unveiled
Have you ever tasted something so delightful, it instantly becomes your go-to treat for every occasion? That’s exactly what happened with our black cherry jelly recipe. It’s not just any jelly; it’s a luscious secret twist unveiled. Imagine the rich, deep flavors of black cherries enveloped in a soft, spreadable jelly that elevates every bread, dessert, and snack to a gourmet experience. Now, we’re sharing this culinary treasure with you!
In this recipe:
- A step-by-step guide to making black cherry jelly
- Tips for capturing the perfect consistency
- Secret ingredients that make this recipe stand out
Additionally, for those who have fallen in love with making homemade jellies, check out our guide on Muscadine Jelly Secret. It’s a perfect companion to this recipe. And if you’re looking for something equally luscious to pair with your newly made jelly, our Peanut Butter Cake Delight is a match made in heaven. Dive into these recipes, and let’s create something deliciously unforgettable together!

Who Can Make This Recipe: Accessibility and Preparation
Wondering if the Easy Black Cherry Jelly Recipe is right for you? Whether you’re a beginner or an experienced cook, this recipe is designed to be straightforward and rewarding. With a little patience and the right tools, anyone can whip up a batch of this delicious jelly. So, let’s dive into what you’ll need and what to expect in terms of difficulty and time commitment.
Essential Kitchen Tools and Equipment
Before you start, ensuring you have the necessary equipment is crucial. Here’s what you’ll need:
- A large pot for cooking the cherries
- A jelly strainer or cheesecloth for separating the juice
- Canning jars and lids, if you’re interested in the Black Cherry Jelly Recipe for Canning
- A cherry pitter, especially helpful how to pit wild black cherries efficiently
Now, let’s talk about the process. While the steps are simple, they do require attention to detail—especially during the pitting and cooking stages. The entire process, from pitting the cherries to jarring the finished product, can take a few hours. However, the actual hands-on time is quite manageable, making this an excellent project for a lazy afternoon.
The difficulty level of the Easy Black Cherry Jelly Recipe is beginner-friendly, though the nuances of cooking and canning can offer something for the more experienced as well. Whether you’re making a small batch to enjoy at home or canning for future use, the satisfaction of creating your own jelly is unparalleled.
Remember, the key to a successful black cherry jelly lies in the preparation. Take your time pitting the cherries and ensure your equipment is ready before you begin. With a little prep work, making your own jelly can be a fun and rewarding experience. So, why not give it a try?
Gathering Your Ingredients: What You’ll Need
Now that we’ve covered the equipment, let’s dive into the ingredients. The right picks can make or break your cherry jelly. So, how do we ensure we’re choosing the best? Let’s find out. Quality matters, especially when it comes to the star of our show: the cherries.
Key Ingredients for Your Jelly Masterpiece
Fresh Black Cherries: The foundation of our wild black cherry jelly recipe. You’ll need about 2 pounds. These little gems are pivotal for that deep, rich flavor.
Pectin: Essential for setting your jelly. This black cherry jelly recipe with pectin ensures a perfect texture every time.
Sugar: It’s not just for sweetness; it helps preserve the jelly too. You’ll want about 4 cups.
Lemon Juice: A splash adds brightness and balances the flavors. About 2 tablespoons should do.
Water: Just a bit, to help dissolve the pectin and sugar.
Choosing high-quality ingredients is crucial. They elevate your jelly from good to great. Wondering about substitutions? There are options. For instance, if fresh cherries aren’t available, frozen ones can work in a pinch. But remember, each change can slightly alter the final taste and texture. Ingredient replacement options can save the day, but they might tweak your results. Always aim for the best quality you can find and afford. This approach ensures a delicious outcome every time.
Ready to start? With these ingredients in hand, you’re all set to create a stunning black cherry jelly. Let’s get cooking!

Step-by-Step Guide to Making Black Cherry Jelly
Now that we’ve got all our ingredients ready, let’s dive into the exciting part: how to make cherry jelly. Making the best wild black cherry jelly recipe is easier than you might think. Follow these steps, and you’ll be on your way to creating a delightful homemade treat.
Preparing Your Cherries
First off, wash your cherries thoroughly. Then, pit them. Yes, it’s a bit of work, but think of the delicious outcome! Once pitted, chop them coarsely. You’ll need about 4 cups of cherries to get started.
Next, place your cherries in a large pot and add just enough water to cover them. Bring to a boil, then simmer for 10-15 minutes. The goal here is to extract all that juicy flavor. After simmering, strain the mixture through a fine mesh sieve or cheesecloth. You should end up with a beautiful, clear juice. This is the base of your jelly.
Now, let’s talk gelatin. For every cup of juice, you’ll need about 1-2 tablespoons of gelatin. Sprinkle the gelatin over a small amount of cold water to let it bloom. Then, heat some of the cherry juice and dissolve the bloomed gelatin into it. Mix this back into your main juice pot.
Add sugar to taste. Remember, the sugar not only sweetens your jelly but also helps it set. Bring the mixture to a full rolling boil, stirring constantly. Then, reduce the heat and simmer until it begins to thicken. This could take around 10-20 minutes.
Tip: How do you know it’s ready? Look for the mixture to coat the back of a spoon. It should form a gel-like consistency that holds its shape when cooled.
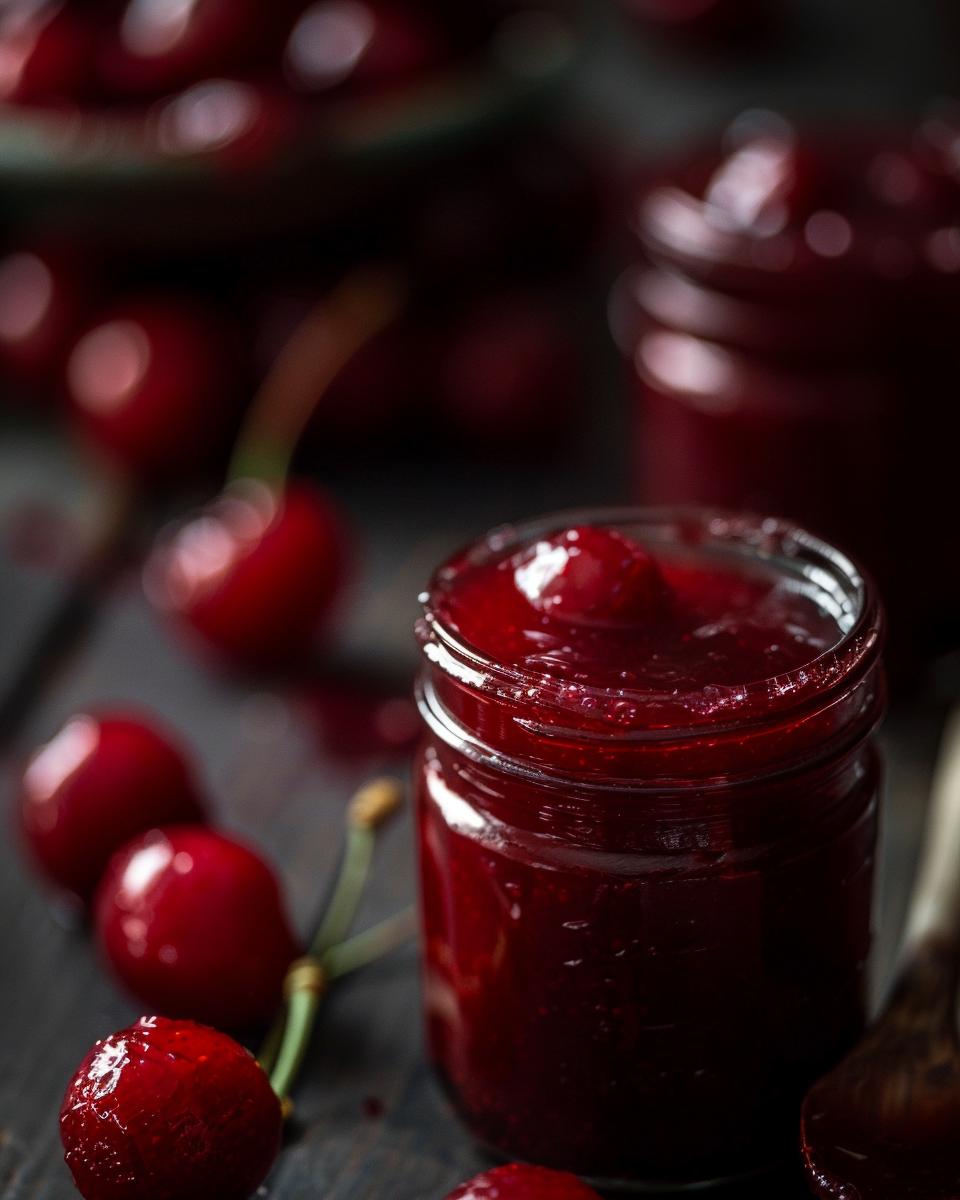
Finally, pour your jelly into sterilized jars, leaving a bit of space at the top. Seal them up and process in a water bath for 10 minutes to ensure they’re shelf-stable.
And there you have it! The best wild black cherry jelly recipe, easy and satisfying to make. Enjoy your homemade jelly on toast, with desserts, or as a sweet gift for friends and family.
Serving and Storing Ideas and Tips
Now that we’ve walked through the steps of making your very own black cherry jelly recipe without pectin, let’s dive into the best ways to serve and store your creation. Whether you’re a beginner or an experienced cook, these tips will help you enjoy your jelly to the fullest.
Ensuring the Perfect Set
First things first, ensuring your jelly sets properly is crucial. After all, we want that perfect, spreadable consistency, right? As you cook, keep an eye out for the mixture thickening and watch for those visual cues. Does it coat the back of a spoon? Are you seeing it drip slowly rather than run off? These signs mean you’re on the right track. If you’re trying this black cherry jelly recipe without pectin, patience is your friend. It might take a bit longer to reach the desired thickness, but the wait is worth it.
So, serving black cherry jelly—what’s the best way? Honestly, it’s versatile. Spread it on toast, swirl it into yogurts, or even dollop it on top of your favorite desserts. The rich, deep flavor of black cherries elevates any dish.
Now, onto storing cherry jelly. Once you’ve jarred your jelly and let it cool, you’ll want to store it in a cool, dark place. A pantry or cupboard away from direct sunlight is perfect. Sealed properly, your jelly can last up to a year. Once opened, keep it in the refrigerator to preserve its freshness. Remember, if you notice any odd smells or mold, it’s best to discard it.
With these tips, you’re all set to enjoy your homemade jelly. The process might seem daunting at first, but once you’ve tasted your creation, you’ll see it’s all worth it. Happy cooking!

Pro Tip: Elevate Your Black Cherry Jelly Making
- Firstly, select ripe cherries for a richer black cherry jelly recipe.
- Secondly, always use a heavy-bottomed pot to prevent burning.
- Moreover, skim off any foam for a clearer jelly appearance.
- Additionally, test jelly’s set on a cold plate before canning.
- Furthermore, sterilize jars thoroughly to ensure long-term freshness.
- Finally, label your jars with the date for easy pantry organization.
FAQ: Enhancing Your Black Cherry Jelly Experience
Got burning questions about making the best black cherry jelly? You’re in the right place! Let’s dive into some FAQs to elevate your jelly-making game.
Popular Questions on Making Cherry Jelly
1. Can I use alternative sweeteners, and how do they affect the jelly’s flavor and set?
Yes, you can! Alternatives like honey or agave syrup can be used, but they might change the jelly’s flavor profile and setting point. For the best black cherry jelly recipe, using a pectin suitable for low-sugar recipes is key to achieving the right set without compromising on taste.
2. My jelly hasn’t set properly. How can I salvage it?
No worries! Reboiling the jelly with a bit more pectin can help. Just mix 1/4 cup of sugar with a teaspoon of pectin, add it to your jelly, and boil for an additional 2-3 minutes. This should help your jelly reach the perfect consistency.
3. What are some cost-effective tips for sourcing cherries?
To save money, buy cherries in bulk during peak season or look for local farmers’ markets for the best deals. Preserving cherries by freezing or canning allows you to enjoy wild black cherry recipes year-round without breaking the bank.
For more detailed instructions and inspiration, check out this delicious black cherry jelly recipe!