Easy Muscadine Jelly Recipe: Your Guide to the Perfect Homemade Spread
- Discover the simple steps to make muscadine jelly.
- Learn the key to perfect consistency and flavor.
- Get tips for quick, delicious homemade spreads.
Have you ever longed for a homemade jelly that’s both easy to make and irresistibly delicious? Look no further! Our recipe for muscadine jelly will guide you through the process of creating the perfect spread. Transform your Desserts & Sweets or morning toast with a jelly that’s sure to impress.
Many shy away from making Homemade Jams & Jellies, fearing a complex, time-consuming process. Rest assured, this recipe will change your mind. It’s fast, foolproof, and yields a jelly with just the right balance of sweetness and tartness. Plus, the muscadine’s natural pectin means achieving that dreamy texture is a breeze.
But why stop at jelly? Once you’ve mastered this, why not explore other delightful homemade creations? For instance, our meatloaf recipe without eggs offers a hearty dinner option, while the half sour pickle recipe adds a tangy, crisp touch to your meals.
So, are you ready to make your own muscadine jelly? Let’s get started and make your next Desserts & Sweets experience unforgettable!

Preparation Essentials for Muscadine Jelly
Ready to embark on your jelly-making journey? Whether you’re a beginner or a seasoned home cook, this Muscadine Jelly Recipe for Beginners is tailored just for you. We’re talking about a simple and foolproof process, perfect for anyone looking to dip their toes into the world of Easy Jelly Making Process. So, what do you need to get started?
Gathering Your Jelly Making Equipment
First things first, let’s talk equipment. To ensure your jelly-making experience is smooth and successful, you’ll need a few basic tools:
- A large pot for cooking down the muscadine mixture.
- Clean, sterilized jelly jars to store your homemade creation.
- A strainer or cheesecloth to remove the muscadine skins and seeds.
- A ladle or funnel for transferring the jelly into jars.
- Lids and bands to seal the jars for preservation.
With these items at the ready, you’re all set to make a batch of delightful muscadine jelly. Remember, the key is in the preparation. Having everything on hand means you can focus on the fun part – the cooking!
Now, if you’re seeking inspiration or guidance, there’s a wealth of resources available online. For a variety of jelly and jam recipes, including muscadine, check out Better Homes & Gardens. They offer a treasure trove of ideas and techniques that can help elevate your Jelly Making Equipment to the next level.
So, have you rounded up all your equipment? Great! You’re now ready to delve into the Easy Jelly Making Process and create a batch of homemade muscadine jelly that’s bound to be a hit on any occasion. Let’s get cooking!
Ingredients for Muscadine Jelly
Now that we’ve covered the simple equipment needed to make your own muscadine jelly, let’s turn our attention to the ingredients. The magic of jelly-making starts with the quality of what you put into the pot. Trust me, selecting the right Muscadine Jelly Ingredients is the key to achieving that perfect balance of sweetness and tartness in your jelly.
Gathering Your Muscadine Bounty
Are you ready to capture the essence of muscadines in a jar? First things first, you’ll need about 5 pounds of Ripe Muscadine Grapes. Why ripe, you ask? Because that’s where all the flavor lives! You’ll also need 7 cups of sugar to sweeten the deal and a box of pectin to ensure your jelly sets just right. But don’t worry, I’ll guide you through each step.
Essential Ingredients:
- 5 pounds of fresh, ripe muscadine grapes
- 7 cups of sugar
- 1 box of pectin (approximately 1.75 ounces)
Now, for those of you who love a twist, consider adding a hint of lemon zest or a dash of cinnamon for some delightful Jelly Flavor Variations. These optional ingredients can take your jelly from great to extraordinary. Who knows, you might just create a new family favorite!
Have you decided on your flavor adventure? Whether you stick to the classic or experiment with variations, your homemade muscadine jelly is bound to impress. So, let’s roll up our sleeves and get those muscadines ready for the pot!

Step-by-Step Guide to Making Muscadine Jelly
Now that we’ve gathered all the ingredients, are you ready to dive into the delightful process of Making Muscadine Jelly? Let’s transform those plump grapes into a sweet spread that will make your taste buds dance with joy!
- Crush the Grapes: Begin by thoroughly washing your muscadines. Then, in a large pot, crush the grapes to release their juices. You can use a potato masher or your hands for this juicy task. Are you feeling the grape goodness yet?
- Extract the Juice: Once crushed, simmer the grapes over low heat for about 10 minutes to help release all the flavors. Strain the mixture through a fine mesh sieve or cheesecloth to collect the juice. Aim for about 4 cups of grape juice – the foundation of your jelly.
Jelly Gel Point Technique
Now, let’s focus on the magic of jelling. It’s crucial to get this right for the perfect jelly consistency.
- Boil the Juice: Combine the grape juice, sugar, and pectin in a large pot. Stir the mixture well and bring it to a rolling boil. Boil it hard for 1 minute, stirring constantly to prevent sticking and burning. Are you smelling the sweet aroma yet?
- Test for Gel Point: To ensure your jelly sets perfectly, use the Jelly Gel Point Technique. After boiling, take a spoonful of the jelly and cool it quickly. If it wrinkles when pushed with a finger, it’s ready. If not, boil for another minute and test again.
Canning Muscadine Jelly
Finally, the moment we’ve been waiting for – canning your homemade jelly!
- Sterilize Jars: Before filling, sterilize your jars and lids in boiling water for at least 10 minutes. This step is essential for Canning Muscadine Jelly safely and ensuring a long shelf life.
- Seal the Jars: Pour the hot jelly into the sterilized jars, leaving about 1/4-inch headspace. Wipe the rims clean, place the lids on, and screw the bands on until fingertip tight. Process the jars in a boiling water canner for 5 minutes.
- Check the Seals: After processing, remove the jars and let them cool. Check the seals – the lids should not flex when pressed. Any unsealed jars should be refrigerated and used first.
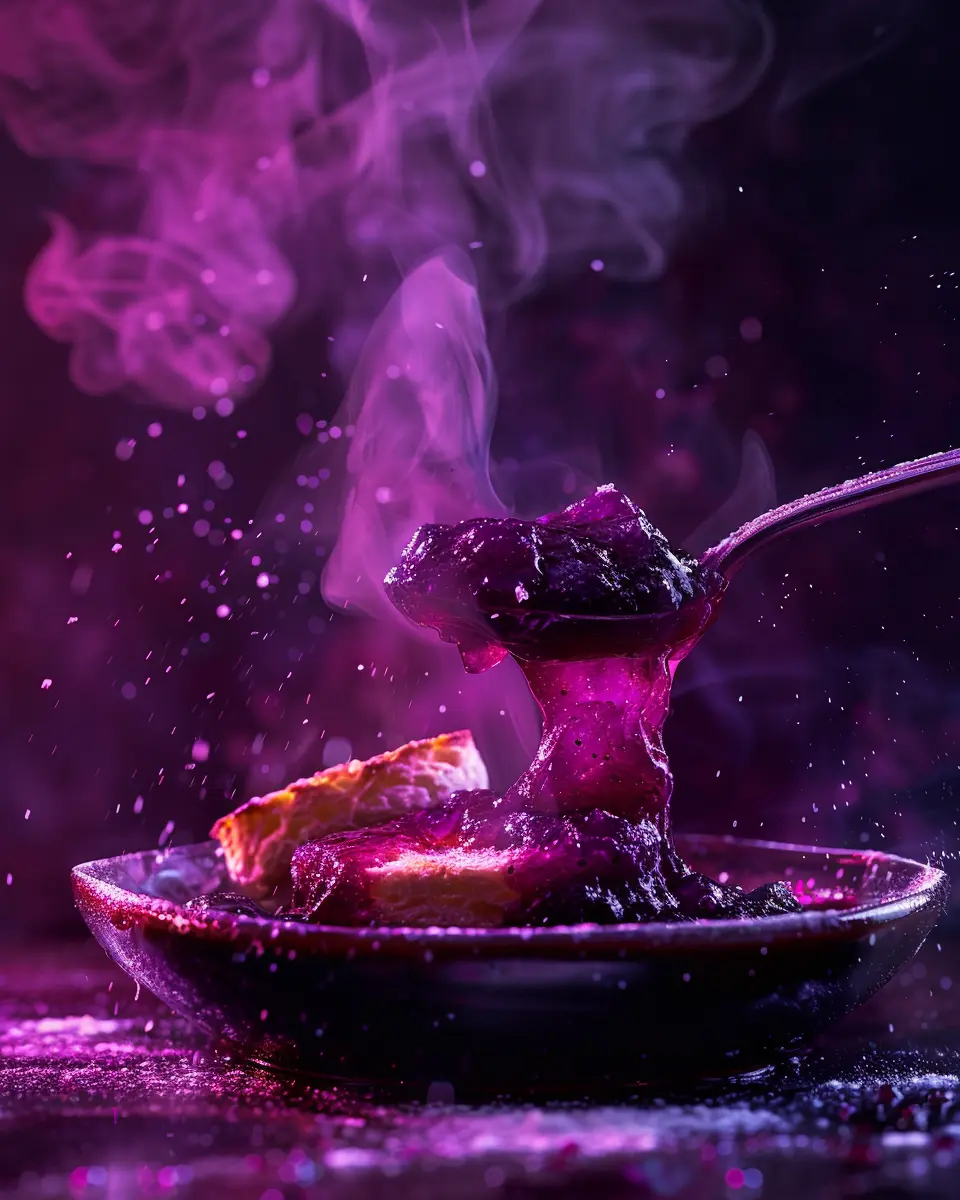
There you have it, a jar of homemade muscadine jelly, ready to be enjoyed with your favorite bread or pastry. Wasn’t that a rewarding experience? Now go ahead, spread the love and the jelly!
Serving and Storing Muscadine Jelly
Now that you’ve mastered the art of making your own muscadine jelly, let’s chat about the best ways to serve and store your homemade creation. Whether you’re a seasoned jelly maker or this is your first foray into the world of home preserves, these tips will ensure that your muscadine jelly is always ready to impress.
Remember how you carefully crushed those ripe muscadine grapes and extracted their sweet juice? And then, how you boiled that juice with just the right amount of sugar and pectin until it reached the perfect gel point? That labor of love is about to pay off. But first, we need to ensure that your jelly is stored correctly, so it remains as delightful as the day you made it.
Enjoying Your Muscadine Jelly
Whether you’re spreading it on a warm piece of toast or pairing it with a sharp cheese, your muscadine jelly is sure to be a hit. Have you thought about stirring a spoonful into your morning yogurt or oatmeal for a burst of flavor? Or maybe you’re a fan of jelly flavor variations and are considering swirling it into a homemade vinaigrette for a unique twist. The possibilities are endless!
When it comes to serving, muscadine jelly shines as a versatile condiment. Its rich, fruity depth adds a special touch to both sweet and savory dishes. So, why not get creative and share your jelly with friends and family? They’ll be asking for your secret Muscadine Jelly Ingredients in no time!
Storing Your Jelly for Longevity
Properly sealing your jelly in sterilized jars is crucial for preservation. Have you ensured a tight seal? If so, your jelly can be stored in a cool, dark place for up to a year. Once opened, keep it in the refrigerator to maintain its freshness. Always use a clean spoon to scoop out your jelly to prevent contamination and preserve its delightful taste.
As you savor the fruits of your labor, remember that those ripe muscadine grapes you started with have now transformed into a pantry staple you can enjoy for months to come. So, what will you spread your muscadine jelly on first?

Pro Tips for Perfect Muscadine Jelly
- Firstly, for a successful recipe for muscadine jelly, always use ripe fruit.
- Secondly, simmer the grapes gently to preserve the delicate flavors.
- Furthermore, skimming off any foam ensures a clearer Homemade Jams & Jellies.
- Additionally, test for the gel point using the cold plate method for precision.
- Also, fill jars to the correct headspace to allow for proper sealing.
- Moreover, invert jars for a few minutes after sealing to distribute the fruit evenly.
- Finally, label your jars with the date to keep track of freshness.
Muscadine Jelly FAQs
After sharing some pro tips, let’s dive into the most commonly asked questions about making muscadine jelly and homemade jams and jellies.
Muscadine Jelly Ingredient Replacements
Q: Can I use alternatives for sugar and pectin due to dietary restrictions?
A: Absolutely! For sugar, consider using honey, agave nectar, or even artificial sweeteners, though the latter may affect the texture. As for pectin, some opt for natural fruit pectin sources like apples or lemon juice. Remember to adjust your recipe as these substitutes can change the set and flavor of your jelly.
Q: What are some money-saving tips for sourcing muscadine grapes and supplies?
A: To save on costs, buy muscadine grapes in bulk during the peak season or directly from local farmers. For supplies, look for sales at craft stores or online marketplaces. Reusing jars and investing in a good jelly-making kit can also cut long-term expenses.
Q: How can I troubleshoot common jelly-making problems?
A: If your jelly isn’t setting, it could be due to insufficient pectin or incorrect cooking time. Ensure you’re following the recipe closely and adjusting for altitude if necessary. For more detailed tips, check out Southern Food Junkie for a step-by-step guide.
General Homemade Jams & Jellies Questions
Q: Do you have any jelly-making tips and tricks for beginners?
A: Start simple, follow recipes to the letter, and don’t be afraid to experiment once you’re comfortable. Use the freshest fruit you can find, and don’t skimp on the quality of sugar and pectin. Sterilize your jars properly to ensure the longevity of your jams and jellies.
Q: What’s the best way to store homemade jelly?
A: Homemade jelly should be stored in a cool, dark place if sealed properly. Once opened, keep it refrigerated and consume it within a month for the best flavor and safety.