Unleavened Bread Recipe: Transform Your Baking Game Today
Are you ready to elevate your baking skills? This unleavened bread recipe will change your baking game forever. Imagine creating delicious, crispy flatbread in just a few simple steps. Whether you’re a beginner or a seasoned baker, this recipe is a must-try. Let’s dive in and transform your kitchen adventures!
In this recipe:
- Simple ingredients for perfect flatbread
- Step-by-step instructions
- Pro tips for best results
- Storage and serving suggestions
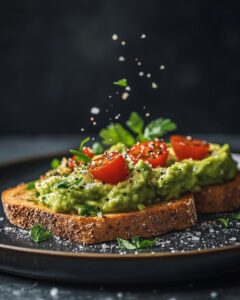
Flatbread is a versatile addition to any meal. With this easy-to-follow guide, you’ll master unleavened bread in no time. Before you start, check out our secret to perfect loaves in our pumpernickel bread recipe. For those who love simplicity, our 3-ingredient bread recipes are a great option.
Ready to get started? Gather your ingredients and let’s bake some unforgettable flatbread!

Who Can Make This Recipe, Difficulty Level, and Essential Tools
This easy unleavened bread recipe is perfect for everyone. Whether you’re just starting your baking journey or you’re an experienced baker, this recipe is for you. It’s incredibly beginner-friendly and requires no special skills.
Difficulty Level: Easy. If you can mix ingredients and roll dough, you’re set. The process is straightforward and forgiving, making it a great choice for those new to baking.
Essential Tools for Unleavened Bread
To make this beginner-friendly bread recipe, you’ll need a few basic tools:
- Mixing Bowl: A good-sized bowl to combine your ingredients is essential.
- Rolling Pin: This will help you roll out the dough evenly.
- Non-stick Skillet or Griddle: For cooking the flatbread to perfection.
If you don’t have a rolling pin, no worries! You can use a clean bottle or any cylindrical object to roll out the dough. The non-stick skillet or griddle ensures even cooking and prevents sticking, making the process smoother.
Need more details on essential tools? Check out this comprehensive guide on unleavened bread tools to ensure you have everything you need.
With these simple tools and an easy-to-follow recipe, you’ll have delicious unleavened bread ready in no time. So, gather your ingredients, grab your tools, and let’s get baking!
The Ingredients Needed to Make Unleavened Bread
Now that we’ve discussed the minimal equipment needed, let’s dive into the unleavened bread ingredients. Selecting the right ingredients is crucial for achieving the perfect texture and flavor in this simple unleavened bread recipe. With just a few basic items, you can create a delicious unleavened bread without yeast that’s perfect for any occasion.
Essential Ingredients
For this recipe, you’ll need:
- 2 cups all-purpose flour – This forms the base of your dough, providing structure and texture.
- 1/2 teaspoon salt – A pinch of salt enhances the flavor of the bread.
- 1/4 cup water – Water is essential to bring the dough together and achieve the right consistency.
These ingredients are likely already in your pantry, making this recipe incredibly accessible. Do you have them on hand? If not, a quick trip to the store will set you up for baking success.
Remember, the quality of your ingredients can impact the final product. Use a high-quality all-purpose flour to ensure your bread has the best possible texture.
With these basics, you’re one step closer to making delicious unleavened bread. Ready to get started? Let’s move on to the mixing and kneading process in the next section!

Step-by-Step Guide on How to Make Unleavened Bread
Now that you’ve gathered all the ingredients, it’s time to dive into the how to make unleavened bread process. Follow these simple steps for a delightful and crispy unleavened flatbread recipe. Ready to get started? Let’s go!
1. Combine Flour and Salt
In a large mixing bowl, combine 2 cups of all-purpose flour and 1/2 teaspoon of salt. Mix them together evenly to ensure the salt is distributed throughout the flour. This is the foundation of your unleavened bread no yeast recipe.
2. Gradually Add Water
Slowly add 1/4 cup of water to the flour mixture. Stir as you pour, allowing the ingredients to start coming together. Continue mixing until a dough forms. If needed, add a bit more water, one teaspoon at a time, to achieve the right consistency.
3. Knead the Dough
Transfer the dough onto a lightly floured surface. Knead it for 5-7 minutes until it becomes smooth and pliable. This step is crucial for developing the texture of your flatbread. Feeling the dough transform under your hands is part of the fun!
4. Divide and Roll Out the Dough
Divide the dough into 4-6 equal portions. Use a rolling pin to flatten each portion into a thin circle, about 1/8 inch thick. Aim for an even thickness to ensure consistent cooking.
5. Cook the Flatbread
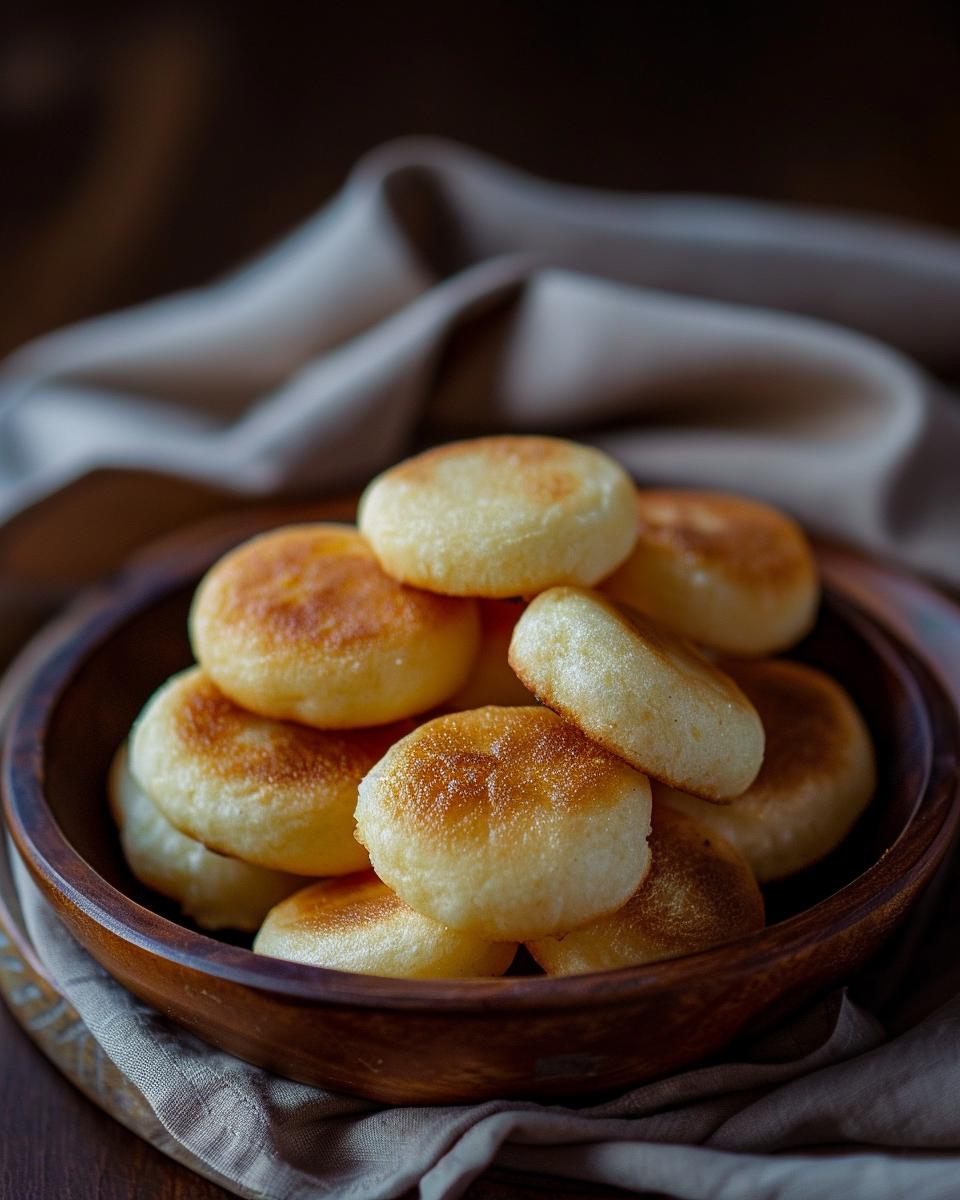
Heat a non-stick skillet or griddle over medium-high heat. Place one of the rolled-out dough circles onto the hot surface. Cook for 1-2 minutes on each side, or until crispy and golden brown. Repeat with the remaining portions.
6. Serve Hot
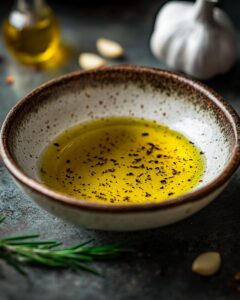
Brush the freshly cooked flatbread with a bit of olive oil and serve it hot. These versatile unleavened bread no yeast flatbreads are perfect on their own or topped with your favorite ingredients. Enjoy!
Now you know how to make unleavened bread from scratch. It’s simple, quick, and incredibly satisfying. Give it a try and bring a touch of tradition to your table!
Serving and Storing Ideas and Tips
Now that you’ve mastered making unleavened bread, let’s explore how to serve and store it. This recipe is accessible for all levels and requires minimal cooking knowledge or experience, making it perfect for a quick homemade treat.
Serving Unleavened Bread
Unleavened bread is incredibly versatile and can be enjoyed in various ways. Serve it warm, straight from the skillet, topped with your favorite ingredients. How about a spread of hummus or avocado? You can also pair it with cheese or use it as a base for mini pizzas.
For a complete meal, consider using unleavened bread as a wrap. Fill it with grilled vegetables, chicken, or falafel for a delicious and satisfying lunch or dinner. The possibilities are endless, and experimenting with different toppings can be a fun and creative way to enjoy your homemade bread.
If you prefer a simpler approach, just brush some olive oil and sprinkle a pinch of sea salt on top. It makes for a delightful side dish to accompany soups or salads.
Don’t forget to share your unique unleavened bread meal ideas with friends and family. It’s a great way to bring everyone together and enjoy a homemade treat.
Storing Unleavened Bread
Storing unleavened bread properly ensures it stays fresh and delicious. Once the bread has cooled, place it in an airtight container. You can store it at room temperature for up to 2 days.
For longer storage, consider freezing the bread. Separate each piece with parchment paper to prevent sticking, then place them in a freezer bag. When you’re ready to enjoy, simply reheat in the oven or microwave.
Reheating is quick and easy. Preheat your oven to 350°F (175°C) and warm the bread for about 5 minutes. Alternatively, a few seconds in the microwave will do the trick, bringing back that fresh, warm taste.
With these tips, you can enjoy unleavened bread at its best, whether you’re serving it fresh or storing it for later. Happy baking!

Pro Tips for Making Unleavened Bread
- Always use high-quality all-purpose flour for better texture.
- Gradually add water to control the dough consistency.
- Use a rolling pin to achieve an even thinness.
- Heat your skillet well before cooking the flatbread.
- Brush the flatbread with olive oil for added flavor.
- Don’t overwork the dough to keep it soft and pliable.
- For extra crispiness, cook each side an additional minute.
- Experiment with toppings like seeds or dried herbs.
- Store in an airtight container to keep the bread fresh.
- Reheat in the oven for a freshly-baked taste.
FAQ – Ingredient Replacements, Money-Saving Options, and Relevant Tips
Making unleavened bread at home can be a fulfilling experience, but you may have some questions about ingredient replacements, budget-friendly tips, and other baking suggestions. Here are some frequently asked questions to help you out:
Popular Questions About Ingredient Replacements
Q: Can I use a different type of flour?
A: Yes, you can use whole wheat or gluten-free flour as an alternative to all-purpose flour. Whole wheat flour will give your bread a nuttier flavor and a slightly denser texture, while gluten-free flour can make the bread suitable for those with gluten sensitivities. Just be aware that the texture may vary, so you might need to experiment a bit to get the perfect consistency.
Q: Can I add other ingredients to enhance the flavor?
A: Absolutely! You can incorporate herbs, spices, or seeds like sesame or poppy seeds into the dough. These additions can enhance the flavor and make your unleavened bread more interesting. Just mix them into the flour before adding water and oil.
Q: Is it possible to use a different type of oil?
A: Yes, you can use different oils like coconut oil or vegetable oil. Each type of oil will slightly alter the flavor and texture of the bread. Olive oil tends to give a richer flavor, while coconut oil can add a subtle sweetness. Experiment to find what works best for you.
Money-Saving Baking Tips
Q: How can I save money when making unleavened bread?
A: One excellent way to save money is to buy your ingredients in bulk or on sale. Flour, salt, and oil have a long shelf life, so purchasing them in larger quantities can be cost-effective. Additionally, consider using store-brand products, which are often cheaper than name brands but offer the same quality.
Q: Are there budget-friendly tools I can use?
A: Yes, you don’t need fancy equipment to make great unleavened bread. A simple rolling pin, a non-stick skillet, and a mixing bowl are sufficient. Investing in a good-quality skillet can make a big difference in the final product without breaking the bank.
For more tips and detailed recipes, check out this guide on unleavened bread.
These tips and answers should help you on your journey to perfecting homemade unleavened bread. Happy baking!