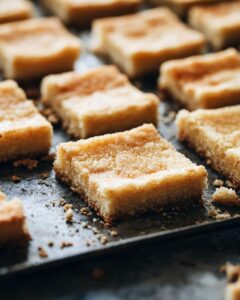
Seniorita Bread Recipe: Bake, Wow, and Devour with This Magical Guide
Ever craved something sweet, fluffy, and utterly delightful? Look no further than this seniorita bread recipe, your new go-to for impressing guests or treating yourself. Within minutes, you can bake, wow, and devour these little slices of heaven, making every moment a magical culinary adventure. But what exactly makes this recipe stand out in a sea of baked goods?
In this recipe:
- Quick and easy steps to deliciousness
- Key ingredients for that perfect fluffiness
- Tips to ensure your Seniorita bread wows every time
Firstly, the simplicity of this recipe is a game-changer. With ingredients you likely have in your pantry, the process is as rewarding as the outcome. Secondly, the unique texture and flavor of Seniorita bread are unmatched. But, how do you achieve that perfect balance? Luckily, we’ve got you covered.
Moreover, for those looking to expand their baking repertoire, explore our guide on Porto’s Cheese Rolls Recipe or dive deeper into the fluffy wonder with our Senorita Bread Recipe Unlocks Secret to Fluffy Perfection. Each link opens a door to baking that’s both simple and mesmerizing, ensuring your kitchen becomes the heart of not just your home, but of sheer culinary delight.

Who Can Bake This Delight?
So, you’re curious about who can bake this Señorita Bread? Let’s dive in. Firstly, this easy bread recipe is surprisingly approachable. Whether you’re a beginner or a seasoned baker, creating this fluffy wonder is within your grasp. But, what makes it so accessible?
Essential Bread Baking Equipment
Before you start, you’ll need some basic bread baking equipment. Don’t worry; it’s nothing too fancy:
- A sturdy mixing bowl
- Measuring cups and spoons
- A kitchen scale for precision (optional but helpful)
- A dough scraper or bench knife, which you can find here: King Arthur Baking Company
- And, of course, a reliable oven
With these tools at your side, you’re all set to tackle the bread making process. Now, onto the big question: how hard is it to bake Señorita Bread?
Frankly, whether it’s your first attempt at a homemade bread recipe or you’re a pro, you’ll find joy in the simplicity of this recipe. The process is straightforward, with clear steps that guide you through mixing, kneading, and baking. Plus, the satisfaction of pulling a freshly baked loaf from the oven is unbeatable.
Ultimately, this Señorita Bread recipe is a fantastic starting point for beginners and a fun, quick bake for the experienced. It proves that delightful, fluffy bread doesn’t require professional skills, just a love for good food and the joy of baking. So, why not give it a try? You might just surprise yourself with how easy and enjoyable bread making can be.
Gathering Your Ingredients
Now that we’ve covered the minimal equipment needed, let’s dive into the heart of our senorita bread adventure – the ingredients. Choosing the right senorita bread ingredients is crucial. They are the building blocks of our delicious, sweet coconut bread recipe. After all, the perfect outcome hinges on the quality and accuracy of what goes into the dough and filling.
What You’ll Need
For the dough:
- 2 cups all-purpose flour (For a gluten-free bread recipe, substitute with gluten-free flour blend)
- 1/4 cup sugar
- 1 packet (2 1/4 tsp) instant yeast
- 1/2 cup warm milk (Dairy-free milk for substitution)
- 1 large egg, beaten
- 1/4 cup unsalted butter, melted (Use coconut oil for a dairy-free option)
For the filling:
- 1 cup sweetened shredded coconut
- 1/2 cup condensed milk (For a lighter version, use low-fat condensed milk)
- 1 tsp vanilla extract
Accuracy in measuring these bread-making ingredients cannot be overstated. Baking is a science, after all. So, grab those measuring cups and let’s get precise! Are you ready to embark on this baking journey with me? Let’s make sure we have everything on this list and start creating our very own sweet coconut bread recipe. Together, we’ll make baking a piece of cake!

Step-by-Step Baking Guide
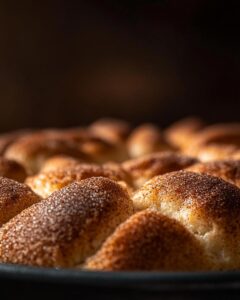
Now that we’ve gathered all our ingredients, let’s dive into how to make senorita bread. Trust me, the aroma of freshly baked bread is just a few steps away! Ever wonder what makes senorita bread so irresistibly soft and fluffy? It all starts with how you mix and knead your dough. Let’s break it down together, shall we?
First off, mix your bread dough recipe according to the instructions. Remember, the key to a perfect dough texture is in the kneading. Don’t shy away from putting a bit of elbow grease into it! Kneading helps develop the gluten, which gives our senorita bread its signature chewy texture. Aim for a smooth, elastic dough, and then let it rest. This bread proofing process is crucial for a fluffy outcome.
Preparing the Filling and Shaping Your Bread
While our dough is taking a well-deserved nap, let’s prep the filling. This sweet, buttery heart is what sets senorita bread apart. Make sure it’s creamy and spreadable for easy filling. Now, for the fun part – shaping! Divide your dough into equal portions. Flatten each piece, add a dollop of filling, and seal it well. Got it? Great!
After shaping, give your bread a second round of proofing. This step is vital, so don’t rush it. It ensures our bread rises to the occasion, literally. Then, it’s showtime – baking! Preheat your oven and bake according to the recipe. Keep an eye on it, as oven temperatures can vary.
So, ready to put these bread shaping tips to the test? With a bit of practice, you’ll master how to make senorita bread that’s as good as, if not better than, your favorite bakery’s. Happy baking!
Serving and Storage Insights
Now that we’ve walked through the steps of making senorita bread, let’s dive into the best practices for serving and storing it. Isn’t it amazing how a few simple ingredients come together to create something so delightful? But, to keep that delightfulness intact, there are a few tricks you should know.
First off, achieving the perfect texture starts with how you mix and knead the dough. It’s all about balance; too little and your bread might be dense, too much and it could become tough. Then, there’s the art of preparing and inserting the filling. It’s a step that requires a gentle hand and a bit of patience to ensure every bite is as good as the last. Lastly, shaping, proofing, and baking are the final steps that bring everything together. These stages are crucial for that fluffy, irresistible outcome we all crave in homemade bread baking.
Best Practices for Bread Storage and Reheating
So, you’ve baked the perfect batch of senorita bread. Now, how do you keep it fresh? Here’s where bread storage tips come into play. Ideally, you want to store your bread in a cool, dry place. A bread box or a tightly sealed container can work wonders in keeping it fresh for a few days. But, can you freeze the rolls? Absolutely! Freezing is a fantastic option for extending their shelf life. Just make sure to wrap them tightly to prevent freezer burn.
When it comes to reheating, there are a few reheating cake tips that can help bring back that just-baked taste and texture. A quick stint in the oven or toaster can revive the bread, making it taste freshly baked once again. Remember, the key is to heat it just enough without drying it out.
With these tips, you’re all set to enjoy your homemade senorita bread to the fullest. Happy baking, storing, and savoring!

Pro Tip for Perfect Señorita Bread
- Firstly, ensure all ingredients are at room temperature for consistency.
- Secondly, accurately measure flour using a spoon-and-level method.
- Moreover, for the dough to be smooth, knead it for at least 10 minutes.
- Additionally, allow the dough to proof in a warm, draft-free area.
- Interestingly, rolling the dough tightly seals in the sweet filling.
- Also, preheat your oven for at least 15 minutes for even baking.
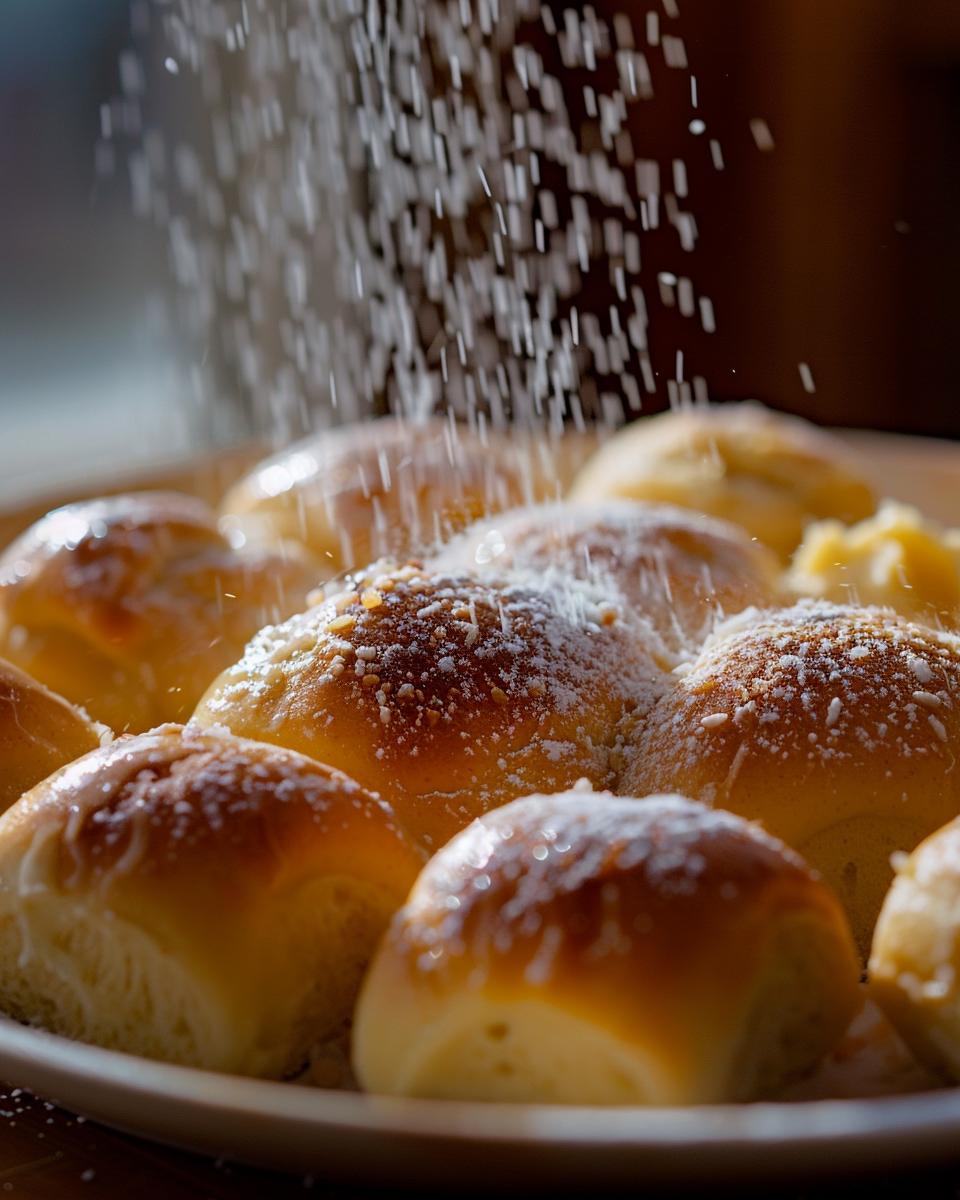
- Finally, brush the top with butter immediately after baking for a glossy finish.
Follow these tips to elevate your senorita bread recipe to the next level!
Frequently Asked Questions
After diving into the “pro tips” for making that perfect loaf of senorita bread, you might still have a few questions. Don’t worry, we’ve got you covered with answers to some of the most common queries.
Making Senorita Bread: Your Questions Answered
Q1: What are some ingredient replacement options for common dietary restrictions?
For those with gluten sensitivities, replacing the traditional all-purpose flour with a gluten-free blend is a great option. Check out King Arthur Baking for high-quality flour alternatives. If you’re dairy-free, using unsweetened almond or coconut milk instead of cow’s milk works wonders.
Q2: Are there money-saving options for sourcing high-quality ingredients?
Yes, indeed! Buying ingredients like flour and yeast in bulk can significantly reduce costs. Also, consider local farmers’ markets for fresh eggs and milk, which can be more cost-effective and fresher than store-bought options.
Q3: Can you provide bread baking troubleshooting tips?
If your bread isn’t rising, double-check your yeast’s expiration date and ensure your liquids are warm (not hot) to touch. For bread that’s too dense, try kneading it longer to develop the gluten further.
Q4: What are some homemade bread tips for beginners?
Start with simple recipes to build your confidence. Always measure your ingredients accurately, and don’t rush the proofing process. Patience is key!
Q5: How can I ensure my senorita bread has the perfect texture?
Moisture is crucial. Make sure to cover your dough during the resting period to prevent it from drying out. Additionally, a consistent oven temperature is vital for that perfectly baked loaf.