Señorita Bread Recipe: Secrets to Achieving Fluffy Perfection Revealed
Have you ever wondered how to achieve that fluffy perfection in a señorita bread recipe? The kind that melts in your mouth with its buttery goodness? You’re not alone. Many have tried and ended up with dense, heavy loaves that don’t do justice to the delicate nature of this Filipino favorite. However, the secret to unlocking the soft, cloud-like texture of señorita bread is simpler than you might think.
In this recipe:
- Discover the secret to fluffy señorita bread
- Step-by-step guide to perfecting your bake
- Tips and tricks for ensuring soft, delicious bread every time
Moreover, for those who are venturing into the world of baking, it’s crucial to not get disheartened by initial failures. In fact, mastering the art of baking starts with understanding the nuances of each recipe. For instance, if you’re also interested in exploring other types of bread, our Easy, Crusty Sourdough Bread Recipe is a great next step. Additionally, our Tangy Sourdough English Muffins Recipe can further expand your baking repertoire. Both of these recipes embrace the simplicity and joy of baking, offering you a gateway to a world where fluffy, crusty, and tangy delights await.

Who Can Make Señorita Bread
So, you’re intrigued by the fluffy, buttery allure of señorita bread? Let’s dive into what it takes to bring this Filipino delight to your kitchen. Firstly, understand that while the señorita bread recipe may seem daunting, it is quite manageable with the right approach. Anyone from novice bakers to seasoned pros can achieve success with this recipe, especially if they have a señorita bread recipe easy in hand.
Before you start, let’s talk about the equipment you’ll need:
- A sturdy mixer (though hand mixing is possible, it requires more effort)
- Quality baking sheets
- Parchment paper to prevent sticking
- A dough scraper can also be handy
For those looking to dive deeper into the world of baking beyond parchment paper, essential tools like a bench knife can significantly ease the process.
Setting Expectations for First-Timers
Moreover, it’s crucial to set the right expectations. If this is your first time baking bread, remember that practice makes perfect. An authentic señorita bread recipe might take a few tries to master. The key is persistence and patience. Your first batch might not be perfect, but it will be a stepping stone to achieving that ideal texture and flavor.
Additionally, this journey into Filipino bread recipes opens up a world of delicious, fluffy breads that are not just delightful to eat but also immensely satisfying to make. Keep in mind, the art of bread making is as much about the process as it is about the final product. So, whether you’re following an easy señorita bread recipe or venturing into more complex Filipino bread recipes, enjoy the journey of baking. With each attempt, you’re one step closer to perfecting your señorita bread.
Ingredients Needed for Señorita Bread
Now that we’ve covered the minimal equipment needed, let’s dive into the ingredients. The right ingredients are crucial for the perfect senorita bread. Ever wonder why some recipes just stand out? It often boils down to the quality and combination of ingredients used. So, let’s ensure your senorita bread is the talk of the town!
Let’s Talk Ingredients
For the Bread Dough:
- 2 cups all-purpose flour – the foundation of our dough.
- 1/4 cup sugar – for just the right sweetness.
- 1 packet (2 1/4 tsp) active dry yeast – the senorita bread recipe with yeast ensures a fluffy texture.
- 1/2 cup warm milk – activates the yeast.
- 1 large egg – binds the dough.
- 1/4 cup unsalted butter, melted – adds richness.
- 1 tsp salt – balances the sweetness.
For the Filling:
- 1/2 cup softened butter – the key to a creamy filling.
- 1/2 cup brown sugar – for that caramel-like sweetness.
- 1/4 cup bread crumbs – a unique component that adds texture.
- 1 tsp vanilla extract – enhances flavor.
When sourcing ingredients, aim for quality. Fresh yeast can make a big difference in your senorita bread recipe with yeast. Likewise, using real butter over margarine in the Starbread señorita bread ingredients can elevate the taste and texture. For the Spanish bread ingredients, like flour and sugar, opt for reputable brands. Remember, great ingredients lead to great results!

Step-by-Step Guide to Making Señorita Bread
Now that we’ve gathered all our ingredients, let’s dive into how to make Señorita Bread. The journey from flour to fluffy perfection is easier than you think, and I’m here to guide you every step of the way. Are you ready to create some bakery magic at home?
First off, mixing and kneading the dough is crucial. This step sets the foundation for our bread’s texture. Start by combining your dry ingredients in a large bowl. Then, gradually add the wet ingredients, mixing until a sticky dough forms. Transfer this onto a floured surface and knead until it’s smooth and elastic. Yes, it takes a bit of elbow grease, but think of the delicious outcome!
Preparing the Filling and Baking
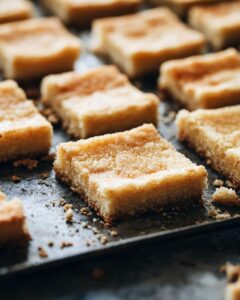
Next, let’s tackle the filling, a key feature of our Spanish bread recipe. In a separate bowl, mix butter, sugar, and breadcrumbs. This mixture will give our Señorita Bread its signature sweet, buttery filling. Now, divide your dough into small portions, flatten each, and spoon a portion of the filling into the center. Then, seal and shape them into logs. This part is fun, almost like crafting your own edible art!
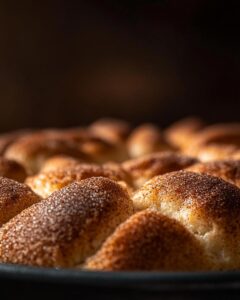
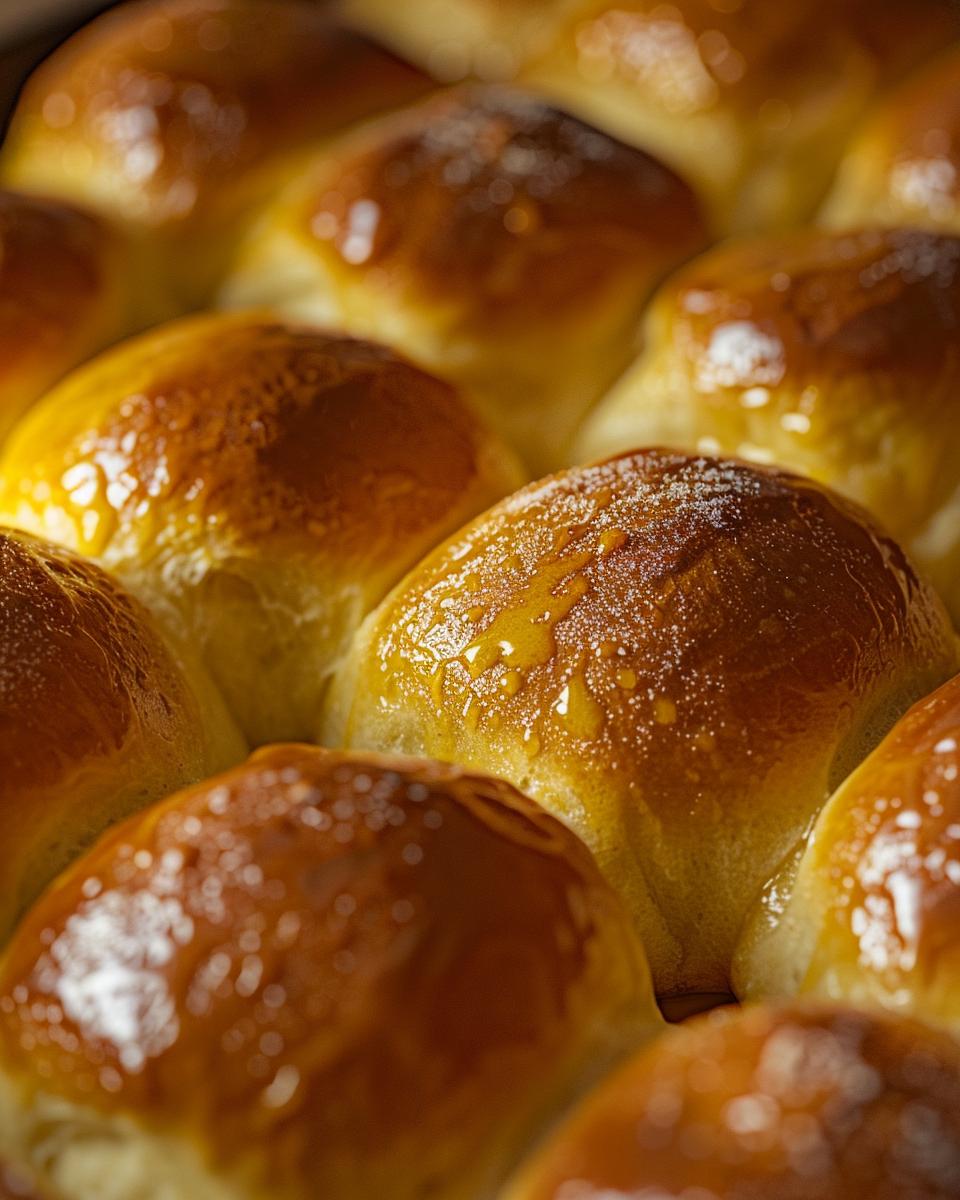
Finally, for baking, ensure your oven is preheated to the right temperature. Place your bread rolls on a baking sheet, giving them space to expand. Bake until they’re golden brown and emit a mouthwatering aroma. Remember, patience is key. Let them cool slightly before indulging. Trust me, the wait is worth it.
There you have it, a step-by-step guide on how to make Señorita Bread, blending the Filipino Spanish bread recipe into something you can proudly call your own. With these tips, achieving fluffy perfection is within reach every time. Happy baking!
Serving and Storing Señorita Bread
Now that we’ve walked through the delightful journey of making Señorita bread, let’s dive into the equally important aspects of serving and storing it. Achieving that perfect texture isn’t just about mixing and kneading the dough; it’s also about knowing how to keep it fresh and delicious after baking. So, how do you ensure your fluffy creation remains as enticing as when it first came out of the oven?
Storing Your Bread the Right Way
First things first, let’s talk about how to store Señorita bread. The key is to keep it in an airtight container at room temperature. This method helps to maintain its softness and prevents it from drying out. But, can you freeze the rolls? Absolutely! If you’ve baked too much, freezing is a fantastic option. Just wrap the rolls individually in plastic wrap and then place them in a freezer bag. They can last up to a month, ensuring you’ve always got the best Señorita bread near me – or rather, in your freezer!
Now, when it comes to serving, there’s nothing like enjoying these rolls warm. If you’re reheating them from frozen, a few minutes in the oven will bring back their delightful aroma and softness. Remember, whether it’s for a family dinner or a solo treat, the warmth of Señorita bread adds a cozy touch to any meal.
So, there you have it. With these tips, you’re all set to enjoy your Señorita bread at its best, anytime. And remember, whether you’re an experienced baker or trying this for the first time, the joy of baking comes not just from the process, but also from sharing and savoring your creations. Happy baking, and even happier eating!

Pro Tip: Mastering Señorita Bread Recipe
- Firstly, ensure your yeast is fresh for the dough to rise.
- Secondly, use room temperature ingredients to aid in dough formation.
- Moreover, knead the dough until it’s smooth for the best texture.
- Additionally, let the dough rest adequately for fluffier bread.
- Also, roll the filling tightly inside the dough to prevent leaking.
- Furthermore, preheat your oven for even baking of the bread.
- Lastly, brush with butter post-baking for a glossy finish.
FAQs: Señorita Bread Recipe
Got questions about making the perfect Señorita bread? You’re not alone! Let’s dive into some of the most common queries and get you baking like a pro in no time.
Popular Questions on Making Señorita Bread
1. Can I make a señorita bread recipe no yeast version? Absolutely! While yeast adds a traditional flavor and texture, you can substitute it with baking powder. This swap makes for a simpler Filipino bread recipe that’s just as delicious.
2. What are some ingredient replacements for allergies? For those with gluten sensitivities, try a gluten-free all-purpose flour blend. Dairy-free? Use coconut oil instead of butter and a plant-based milk. These swaps ensure everyone can enjoy this authentic Filipino bread recipe.
3. How can I save money on ingredients without losing quality? First, buy in bulk where possible. Second, consider generic brands for basics like sugar and flour. For high-quality ingredients like yeast, check out King Arthur Baking for great deals.
4. Tips for the perfect texture and flavor? The key is in the proofing; make sure your dough is allowed to rise in a warm, draft-free area. Also, don’t skimp on the filling—a generous amount of butter, sugar, and cheese ensures that rich, moist texture and the signature sweet-salty flavor profile.
5. Is there a simple Filipino bread recipe for beginners? Yes, the señorita bread is actually quite beginner-friendly. Focus on mastering the dough and filling, and you’ll be surprised at how simple it is to create this beloved treat. For a step-by-step guide, check out Urban Treats.