Cherry Pie Filling Recipe: Grandma’s Secret You Need to Try
Have you ever wondered what makes Grandma’s cherry pie filling recipe so irresistible? The secret lies in the perfect balance of tartness and sweetness, creating a flavor explosion in every bite. Today, we’re sharing this cherished family recipe with you. Get ready to impress your loved ones with a pie that’s sure to become an instant favorite.
In this recipe:
- Fresh or frozen cherries
- Simple ingredients for a perfect filling
- Pro tips for the best results
First, gather your ingredients. You’ll need fresh or frozen cherries, sugar, cornstarch, lemon juice, salt, water, and butter. These ingredients work together to create a filling that’s both delicious and easy to make.
Next, follow our step-by-step instructions. In no time, you’ll have a homemade filling that’s perfect for pies, tarts, or even as a topping for cheesecake. Speaking of cheesecake, if you’re looking for another delightful dessert, check out our best cheesecake recipe. It’s a must-try!
Finally, remember to experiment with different variations. Whether you prefer a boozy twist or a mix of sweet and tart cherries, this cherry pie filling recipe is versatile enough to accommodate your tastes. If you’re in the mood for more delicious treats, don’t miss our apple cobbler recipe. It’s another crowd-pleaser!
Ready to bake? Let’s dive into this tried-and-true cherry pie filling recipe that has been passed down through generations. Your taste buds will thank you!

Who Can Make This Recipe and What You Need
This easy cherry pie filling recipe is perfect for beginner to intermediate home bakers. It doesn’t require advanced skills, making it accessible for anyone looking to create a delicious homemade pie. Whether you’re a seasoned baker or just starting, this cherry pie recipe is simple but delivers impressive results.
Ingredients and Tools
To make this cherry pie filling, you’ll need a few basic cherry pie ingredients. Here’s what you’ll need:
- 2 cups fresh or frozen cherries, pitted
- 1 cup granulated sugar
- 2 tablespoons cornstarch
- 1 tablespoon lemon juice
- 1/4 teaspoon salt
- 1/4 cup water
- 1 tablespoon butter
For tools, gather the following:
- Medium saucepan
- Wooden spoon or spatula for stirring
- Measuring cups and spoons
The preparation and cooking time for this cherry pie filling recipe is simple and quick. Expect to spend about 15 minutes preparing the ingredients and another 25 minutes cooking them. In less than an hour, you’ll have a delectable filling ready for your pie crust.
Not sure what kind of pie crust to use? Check out this homemade buttery flaky pie crust recipe for the perfect pairing with your cherry pie filling.
With these ingredients and tools, you’re all set to create a mouthwatering cherry pie filling that will impress your family and friends. Happy baking!
The Ingredients Needed to Make Cherry Pie Filling
Now that we’ve covered the minimal equipment required, let’s dive into the heart of our recipe: the ingredients. Choosing the right ingredients is crucial for achieving the perfect fresh cherry pie filling. It’s all about balancing flavors and getting that ideal texture.
Essential Ingredients for the Best Cherry Pie Filling
Here’s a list of what you’ll need:
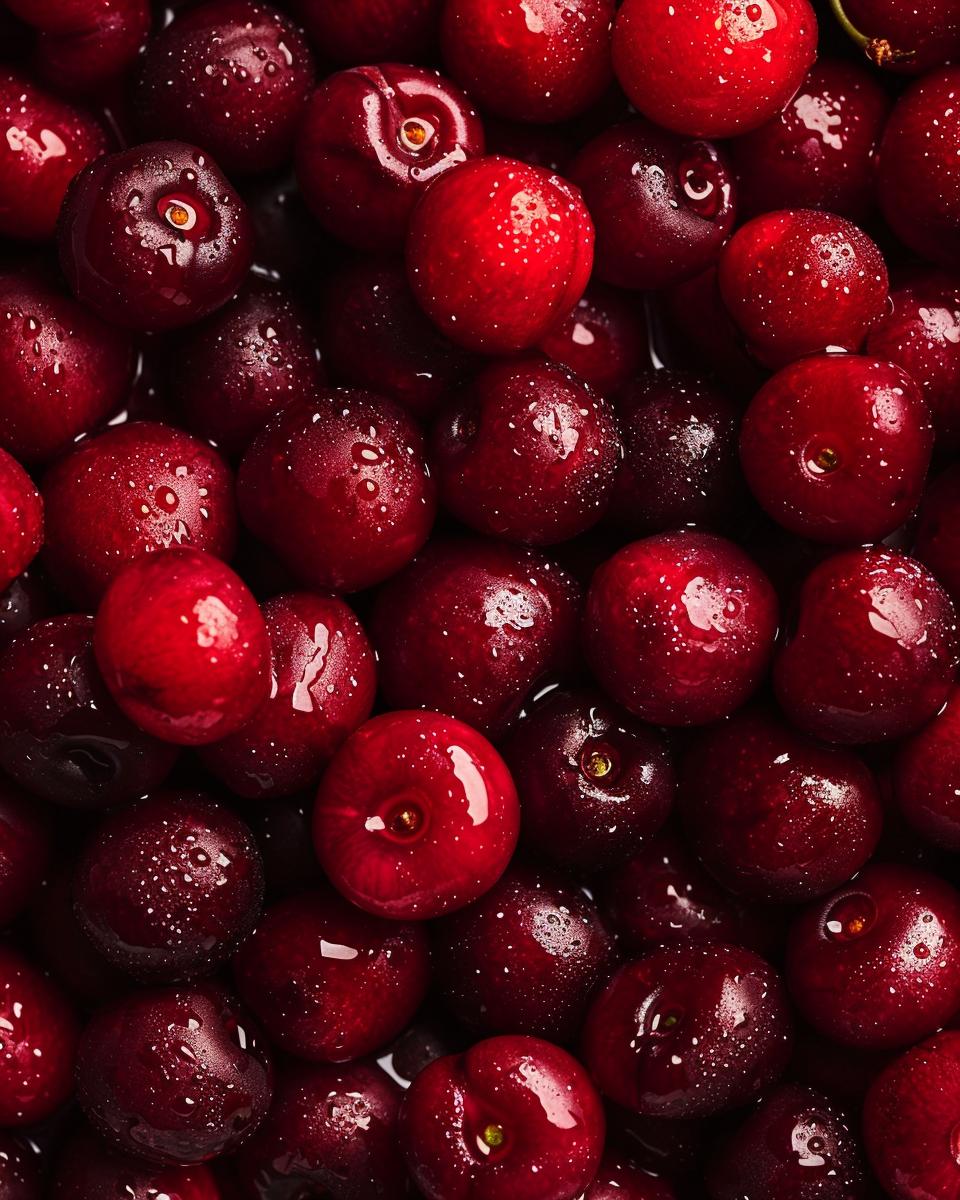
- Cherries: You can use either fresh or frozen cherries. Both sweet and tart cherries work well. If you prefer a sweet flavor, go for sweet cherries. For a tangier taste, opt for tart cherries. You’ll need about 2 cups of pitted cherries.
- Granulated Sugar: This adds sweetness and helps balance the tartness of the cherries. Use 1 cup of granulated sugar.
- Cornstarch: To achieve that perfect cherry pie filling with cornstarch, you’ll need 2 tablespoons. This thickens the filling and gives it a smooth consistency.
- Lemon Juice: A tablespoon of lemon juice enhances the flavor and adds a slight tanginess that complements the cherries beautifully.
- Salt: Just a pinch, about 1/4 teaspoon, to balance the flavors.
- Water: You’ll need 1/4 cup of water to help the ingredients combine smoothly.
- Butter: Stir in 1 tablespoon of butter at the end for a richer, more luxurious filling.
If you’re feeling adventurous, consider adding some optional ingredients for extra flavor:
- Almond Extract: A dash of almond extract can elevate your cherry pie with almond extract to a whole new level. Add 1/2 teaspoon.
- Cherry Liqueur: For a boozy twist, mix in 1-2 tablespoons of cherry liqueur or Grand Marnier.
- Spices: Experiment with a pinch of cinnamon or nutmeg to add depth to your filling.
With these ingredients on hand, you’re well on your way to making a delicious, homemade cherry pie filling that’s sure to impress. Let’s get started and bring that perfect pie to life!

Step-by-Step Guide on How to Make Cherry Pie Filling
Now that we’ve gathered all the ingredients, it’s time to dive into the process of making the cherry pie filling. Follow these detailed, easy-to-follow instructions to create the perfect cherry pie filling from scratch.
Combine the Ingredients: In a medium saucepan, mix 2 cups of fresh or frozen cherries, 1 cup of granulated sugar, 2 tablespoons of cornstarch, 1 tablespoon of lemon juice, and 1/4 teaspoon of salt. Let this mixture sit for about 15 minutes, allowing the cherries to release their juices.
Add Water: Pour in 1/4 cup of water and stir the mixture to combine. This step helps to dissolve the sugar and cornstarch, ensuring a smooth filling.
Cook the Mixture: Place the saucepan over medium heat and cook the mixture while stirring constantly. Bring it to a boil to activate the cornstarch, which will thicken the filling.
Simmer and Thicken
Reduce the heat to low and let the filling simmer for 10-15 minutes. Continue stirring occasionally until the mixture thickens and the cherries become tender. This is crucial for achieving the perfect consistency and flavor.
Incorporate Butter: Remove the saucepan from the heat and stir in 1 tablespoon of butter until it is fully melted and incorporated. This adds a rich flavor and smooth texture to your cherry pie filling.
Cool the Filling: Allow the cherry pie filling to cool to room temperature before using it in your pie crust. Cooling helps the filling to set properly, making it easier to work with.
And there you have it! You’ve successfully made your cherry pie filling from scratch. For an extra tip, if your filling is too thick, add a bit more water. If it’s too runny, let it simmer a bit longer. Now you’re ready to create a delightful cherry pie recipe with fresh cherries that will impress your friends and family.
For visual guidance, check out the video tutorial above, which walks you through each step of the process. Happy baking!
Serving and Storing Ideas and Tips
Now that you’ve mastered the steps on how to make homemade cherry pie filling, let’s dive into the best ways to serve and store your creation. Whether you’re a novice or an experienced baker, these tips will ensure your pie filling remains delicious and ready to use.
Serving Suggestions
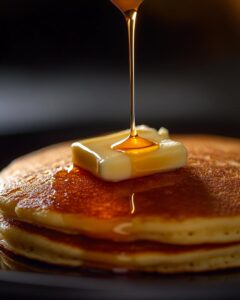
Once your cherry pie filling has cooled to room temperature, it’s ready to be used. You can create a classic cherry pie by filling a pre-baked crust with the mixture. For a quick cherry pie filling option, consider using it as a topping for cheesecake, ice cream, or even pancakes. The possibilities are endless!
To achieve the perfect consistency and flavor, make sure to cool the filling completely before serving. This allows the flavors to meld and the filling to set properly. If you find your filling is too thick, stir in a tablespoon of water at a time until you reach the desired consistency.
For a stunning presentation, try adding a lattice crust or decorative cutouts on top of your pie. This not only enhances the visual appeal but also adds a delightful texture contrast. Check out our video tutorial for step-by-step guidance on creating beautiful crust designs.
When serving, consider pairing your cherry pie with a scoop of vanilla ice cream or a dollop of whipped cream. The creamy textures complement the tartness of the cherries, creating a balanced and satisfying dessert experience.
Storing Tips
Proper storage ensures your cherry pie filling stays fresh and flavorful. Store any leftover filling in an airtight container in the refrigerator for up to 2 weeks. For longer storage, you can freeze the filling for up to 6 months. Simply transfer the cooled filling to a freezer-safe container, label it with the date, and thaw it overnight in the refrigerator when ready to use.
If you’re interested in canning cherry pie filling, follow safe canning practices to preserve your filling for up to a year. This method allows you to have homemade cherry pie filling for canning readily available whenever you need it. Our detailed canning guide provides all the steps you need to know.
Remember, the key to a delicious cherry pie filling is maintaining its vibrant color and fresh taste. By following these serving and storing tips, you’ll enjoy the delightful flavors of your homemade filling anytime you wish.

Pro Tip
- Always use fresh or frozen cherries for the best flavor.
- For a thicker filling, add an extra tablespoon of cornstarch.
- Use a mixture of sweet and tart cherries for a balanced taste.
- If the filling is too runny, cook it a bit longer.
- Incorporate a splash of almond extract for a unique twist.
- To prevent a soggy crust, brush it with egg white before filling.
- Always cool the filling before adding it to the pie crust.
- For a clearer filling, puree the cherries before cooking.
- Add a tablespoon of cherry liqueur for an adult-friendly version.
- Stir constantly to avoid burning the cherry pie filling recipe.
FAQ – Ingredient Replacement Options and Money Saving Tips
How can I make cherry pie filling without cornstarch?
Yes, you can use alternatives like arrowroot powder or tapioca starch. Both work well as thickening agents. Use the same amount as you would cornstarch. Another option is to use all-purpose flour. For every tablespoon of cornstarch, replace it with two tablespoons of flour. This will ensure a smooth and thick consistency without altering the flavor.
Can I make sugar-free cherry pie filling?
Absolutely! You can substitute the sugar in the recipe with stevia or erythritol. Both are excellent sugar alternatives that won’t spike your blood sugar levels. If you prefer a natural option, consider using apple juice concentrate or agave syrup. Adjust the quantity to taste, as these substitutes can vary in sweetness.
What if I only have canned cherry pie filling?
No problem! You can enhance the flavor of canned cherry pie filling by adding a few simple ingredients. Stir in a tablespoon of lemon juice and a teaspoon of almond extract to give it a fresh and vibrant taste. If you prefer a thicker consistency, mix a tablespoon of cornstarch with a little water and stir it into the filling, then heat until thickened.
Are there budget-friendly tips for making cherry pie filling?
Yes, there are several ways to save money while making cherry pie filling. Buy cherries when they are in season and freeze them for later use. You can also purchase frozen cherries in bulk, which are often cheaper than fresh. Using store-brand ingredients instead of name brands can also help reduce costs without compromising the quality of your pie filling.
What are common troubleshooting tips for cherry pie filling?
One common issue is the filling being too runny. If this happens, add more cornstarch or its alternatives and cook until it thickens. Another problem is the filling being too sweet or too tart. Adjust the sugar or lemon juice to balance the flavors. Lastly, if the filling looks cloudy, ensure you are mixing the cornstarch thoroughly and cooking it long enough to clear.
For more tips and variations, check out this comprehensive guide on perfecting your cherry pie filling.