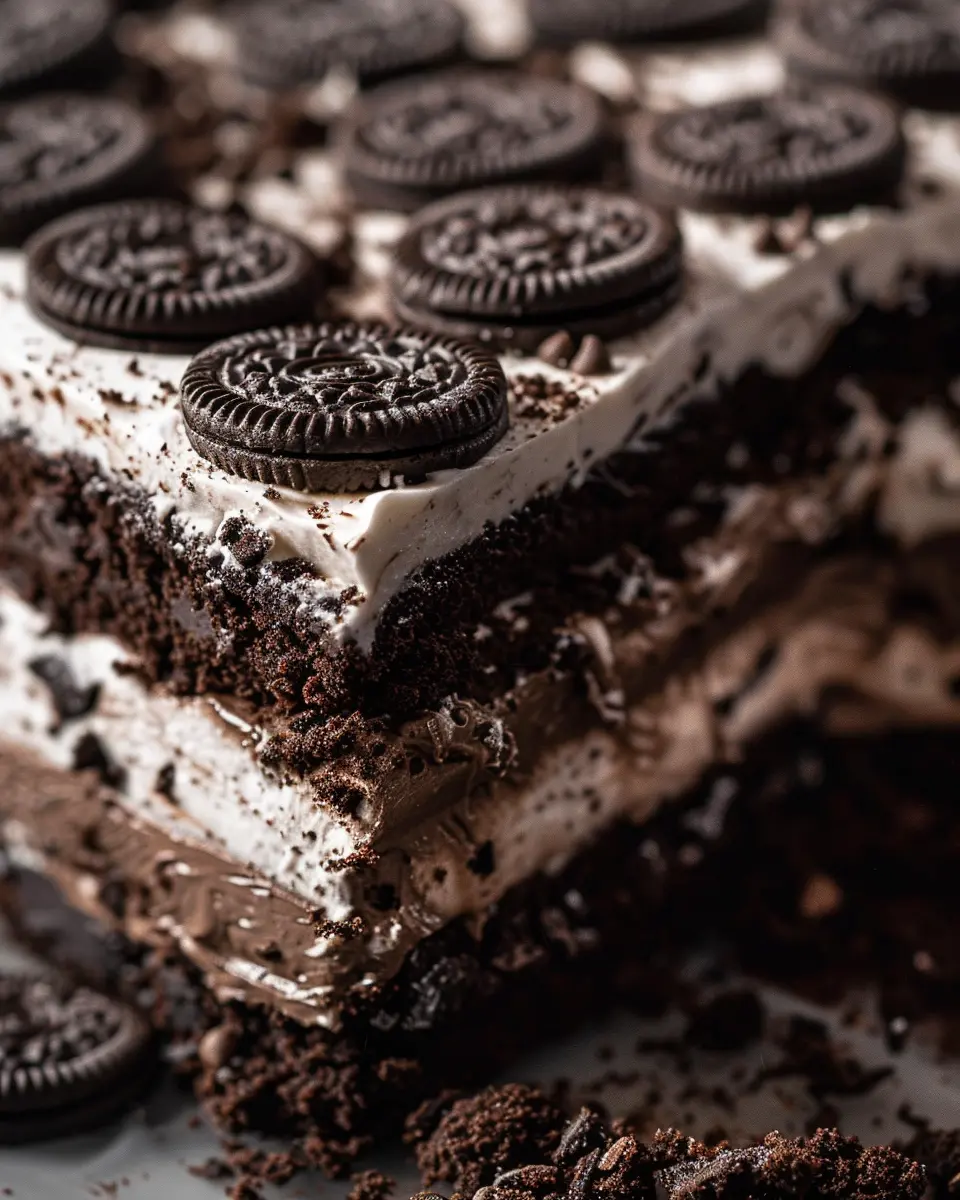
Simple Oreo Cake Recipe: How to Make an Oreo Dream Cake Easily
- Discover a simple oreo cake recipe
- Indulge in a decadent Desserts & Sweets treat
- Learn how to make a dreamy Oreo Dream Cake
Craving something sweet and indulgent? Have you ever dreamt of a dessert that combines the crunch of Oreos with the richness of cake? Look no further! This simple oreo cake recipe is your ticket to a decadent dessert delight that’s sure to satisfy any sweet tooth.
Moreover, the best part is that it’s incredibly easy to make. Even if you’re not a seasoned baker, you can whip up this Oreo Dream Cake without breaking a sweat. Now, imagine the joy of sharing a homemade cake that looks like it came straight from a bakery. Isn’t that exciting?
Additionally, Cakes are the centerpiece of many celebrations, and this one is no exception. Whether you’re hosting a birthday party, a family gathering, or simply treating yourself, this cake will be the star of the show. So, why wait? Let’s dive into the world of Desserts & Sweets and turn your kitchen into a haven of Oreo decadence!
Finally, with our step-by-step guide, you’ll learn all the tips and tricks to create a masterpiece that’s as beautiful as it is delicious. So, preheat your oven and get ready for a baking adventure with the ultimate Oreo Dream Cake. Your dessert game is about to reach new heights!

Who Can Make This No-Bake Oreo Cake
Are you a kitchen newbie or a culinary wizard? Regardless, this Oreo Cake for Beginners is perfect for you. Easy No-Bake Desserts like this are ideal for anyone looking to create a Quick Dessert Recipe without the fuss. So, whether you’re just starting out or you’re looking to add a no-stress treat to your repertoire, this recipe is a sure hit.
Moreover, you don’t need fancy equipment to make this dreamy dessert. A simple mixing bowl, a spatula, and a serving dish are all you need to start. It’s that straightforward!
Preparation Overview
Now, let’s talk about time. You can prepare this Oreo cake in a snap, with just a few minutes of layering and then some patience while it sets in the fridge. Here’s a quick overview:
- Crush Oreos for the base and layers
- Mix your creamy filling
- Layer your ingredients in the serving dish
- Chill until set
Furthermore, with no baking required, you’ll keep your kitchen cool and your spirits high. For inspiration and more decadent dessert ideas, check out Pinterest for a treasure trove of sweets that will make any occasion special.
In conclusion, this Oreo cake is a delightful addition to any dessert table. It’s simple, it’s quick, and it’s absolutely delicious. So why not give it a try? Your taste buds will thank you!
Ingredients for Your No-Bake Oreo Cake
Now that you’re all set with the minimal equipment needed, let’s shift our focus to the stars of the show: the No-Bake Oreo Cake Ingredients. Remember, the secret to a mouth-watering oreo cake lies in the quality and combination of ingredients you choose. So, are you ready to gather what you need for this simple dessert delight?
Gather Your Sweet Essentials
Here’s what you’ll need:
- 36 Oreo cookies (plus more for garnish) – to ensure a rich oreo flavor throughout
- 1/4 cup unsalted butter, melted – for that perfect crust consistency
- 1 cup heavy whipping cream, cold – for a light and airy texture
- 1 teaspoon pure vanilla extract – because quality matters
- 8 ounces cream cheese, softened – for creamy smoothness
- 1 cup powdered sugar – for just the right sweetness
- Additional crushed Oreos for the filling – can you ever have too many Oreos?
Considering Oreo Cake Substitutions? No problem! Use gluten-free Oreos for a gluten-free version, or try coconut cream in place of heavy cream for a dairy-free alternative. And if you’re cutting back on sugar, opt for a sugar substitute that measures like powdered sugar.
When it comes to the heavy cream, make sure it’s cold; this will help you whip up the perfect peak. And choose the best quality vanilla extract you can find – it makes a difference. As for the Oreos, go for the original for that authentic Oreo Cake taste, or get adventurous with different flavors to put a twist on this simple dessert.
With these Simple Dessert Ingredients, your No-Bake Oreo Cake will be the talk of the table. Ready to get mixing? Let’s move on to the next step and start creating your masterpiece!

Step-by-Step Guide to Making No-Bake Oreo Cake
Now that we’ve got our ingredients ready, let’s dive into the How to Make Oreo Cake. Are you excited to put together this Easy Oreo Cake Recipe? I know I am! Follow these steps closely, and you’ll have a scrumptious no-bake cake ready to impress.
- Crush the Oreos: Start by placing your Oreos in a large plastic bag and use a rolling pin to crush them into fine crumbs. You’re aiming for a sandy texture, which will become the base of your cake.
- Prepare the Base: Mix the Oreo crumbs with melted butter until well combined. Press this mixture into the bottom of a springform pan, creating an even layer. This will give your cake a solid foundation, so take your time smoothing it out.
- Chill the Base: Pop the base into the fridge for about 10 minutes to set. This chilling time is crucial for a firm and crunchy layer that holds up to the creamy filling.
Mixing and Layering the Cake
- Mix the Filling: In a large bowl, blend together the cream cheese, powdered sugar, and vanilla extract until smooth. Then, fold in the whipped cream gently to keep the mixture light and airy.
- Add Oreos to the Filling: Crush a few more Oreos (but not too fine this time) and fold them into the filling for that classic Oreo crunch in every bite.
- Layer the Cake: Spoon half of the filling over the chilled base, spreading it out evenly. Add another layer of Oreo crumbs if you like, then top with the remaining filling. Smooth the top with a spatula.
- Chill Again: Cover the cake with plastic wrap and let it chill in the fridge for at least 4 hours, or overnight for best results. This step is non-negotiable because it ensures your No-Bake Cake Instructions lead to a perfectly set cake.
Once your cake has set, it’s time to unleash your creativity. Decorate with whole Oreos, drizzle with chocolate syrup, or sprinkle with Oreo crumbs. The sky’s the limit! So, did you find these steps helpful? Ready to dig into your homemade masterpiece?
Serving and Storing No-Bake Oreo Cake
Now that you’ve mastered the art of making this delightful No-Bake Oreo Cake, let’s chat about the best ways to serve and store your sweet creation. Have you ever wondered how to ensure that every bite of your cake is as perfect as the last? Well, the secret lies in the details of preparation and patience.
Firstly, for those No-Bake Oreo Cake Ingredients, you’ll want to crush your Oreos to just the right texture—not too fine, but with enough chunkiness to give your base that signature crunch. Once you’ve got your base prepared, it’s all about the layering. Alternating between the creamy filling and those crushed cookies ensures every forkful is a heavenly blend of flavors and textures. And remember, simple dessert ingredients can still create the most indulgent experiences!
Ensuring the Perfect Set
Now, let’s talk chilling. Your Oreo cake needs ample time to set in the fridge. This isn’t just a suggestion; it’s a must to achieve that perfect consistency. Aim for at least 4 hours, but if you can resist, overnight is even better. The wait might be a tad torturous, but trust me, it’s worth it. And while you wait, why not ponder over some Oreo Cake Substitutions? Maybe next time you could try a different flavored Oreo or add a hint of mint or peanut butter for a twist?
When it’s time to serve, do so with pride! Cut your masterpiece into slices, and watch as the layers reveal themselves, much to the delight of your eager guests. And if by some miracle there are leftovers, storing your cake is a breeze. Simply cover it with cling film or an airtight container, and pop it back in the fridge. It’ll stay fresh and scrumptious for up to 3 days, though I doubt it’ll last that long!
So, whether you’re a seasoned baker or a newbie in the kitchen, this No-Bake Oreo Cake is forgiving and flexible. With minimal effort and these handy tips on serving and storing, you’re all set to impress. Who knew such simple dessert ingredients could lead to an irresistible treat that keeps everyone coming back for more?

Pro Tips for a Simple Oreo Cake Recipe
- Firstly, use a food processor to crush Oreos evenly for a smooth base.
- Secondly, for a richer taste, mix in a spoonful of cream cheese with the filling.
- Moreover, let the cake chill overnight for optimal firmness and flavor melding.
- Additionally, whip the cream just until stiff peaks form to avoid a runny texture.
- Also, consider using a springform pan for easy removal and perfect presentation.
- Lastly, garnish with crushed Oreo pieces or chocolate shavings for an elegant touch.
FAQ: Tips and Tricks for the Perfect No-Bake Oreo Cake
Got questions? We’ve got answers! Dive into our Oreo Cake FAQs for insider knowledge on creating your dream dessert.
Oreo Cake FAQs
Can I replace the cream cheese with a non-dairy alternative?
Absolutely! For those with dietary restrictions, a plant-based cream cheese substitute works wonders. You’ll maintain that creamy texture without missing a beat.
What if I don’t have Oreo cookies? Can I use another cookie brand?
Of course! While Oreo cookies give that classic taste, feel free to experiment with similar chocolate sandwich cookies. It’s all about tailoring to your taste buds!
Is there a budget-friendly way to make this cake?
Indeed, to keep it a Budget-Friendly Dessert, buy ingredients in bulk or opt for store-brand versions. These tweaks can save pennies without skimping on flavor.
General Cake-Making FAQs
What’s the secret to a moist cake every time?
Moisture is key! Ensure your ingredients are at room temperature and don’t overmix the batter. This keeps your cake tender and divine.
Can I make my cake ahead of time?
Definitely! Most cakes can be made a day or two in advance. Just wrap it up tight and keep it cool. For more tips, check out Life, Love and Sugar for their take on prepping in advance.
Remember, whether it’s Ingredient Replacements or simply a craving for something sweet, your perfect Oreo cake is just a mix away. Get creative, and don’t be afraid to put your own spin on this classic treat!