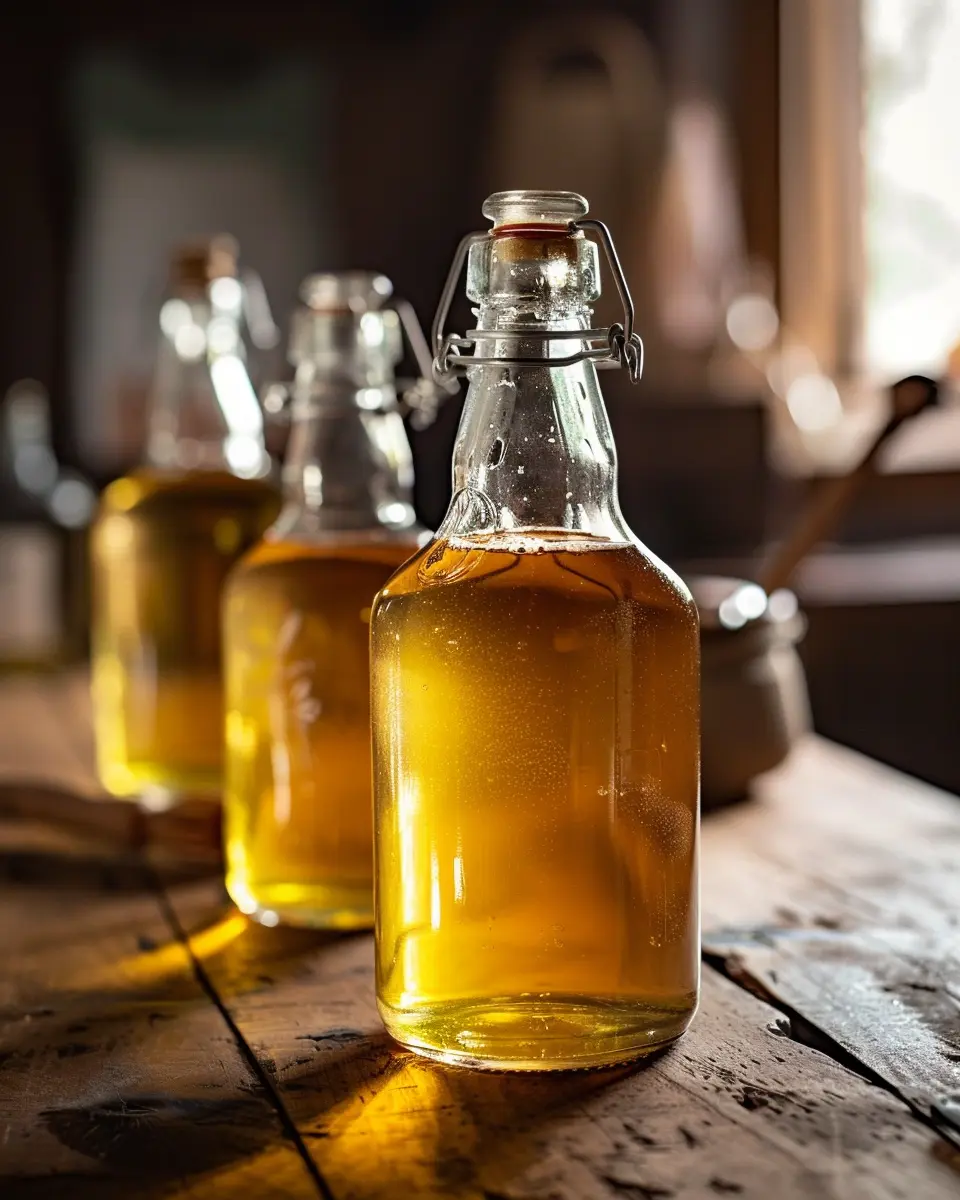
Mead Recipe 1 Gallon: Easy Homemade Honey Wine Brewing Guide
- Simple steps to make mead recipe 1 gallon.
- Insights into the art of brewing homemade drinks.
- Tips for crafting the perfect batch of honey wine.
Have you ever yearned to create your own homemade drinks? Imagine the sweet, ancient melody of honey wine serenading your taste buds. Now, with our mead recipe 1 gallon, that melody can be yours. This enchanting beverage, steeped in history, can be brewed in the comfort of your home.
Indeed, crafting beverages from scratch brings a sense of pride. Furthermore, it connects us to a time-honored tradition. So, why not embark on this delightful journey? Additionally, the process is simpler than you might think. With a few ingredients and a bit of patience, you’ll be sipping on your very own honey wine.
Moreover, this guide is perfect for beginners and seasoned brewers alike. Also, it’s designed to demystify the brewing process. It ensures that you’ll have all the knowledge needed to succeed. So, ready your vessels and gather your honey. It’s time to brew a batch of liquid gold that’s sure to impress.

Who Can Make This Mead Recipe
So, who can embark on this adventure of Mead Making for Beginners? Whether you’re a curious novice or an experienced enthusiast, this recipe is tailored for you. In essence, anyone with a passion for Home Brewing Basics can create this delightful honey wine. Moreover, the process is not as daunting as you may think. In fact, it’s quite straightforward, making it an excellent starting point for those new to the craft.
Understanding the Simplicity of Mead Making
At first glance, brewing mead might seem complex. However, the reality is quite the opposite. The process is simple, and it involves just a few key steps: mixing honey with water, adding yeast, and allowing time for fermentation. Now, let’s talk about the essential Mead Equipment List for a 1-gallon batch:
- A 1-gallon glass carboy or fermentation jug
- Airlock and stopper to allow gases to escape
- Sanitizer to ensure a clean environment for your mead
- A funnel for transferring liquids without spillage
- Siphon or racking cane for bottling
- Yeast, preferably one suited for mead making
- Honey, the star ingredient
- Optional: fruits, spices, or herbs for flavoring
Additionally, you’ll need some patience, as mead matures best over time. But the wait is worth it when you taste the fruits of your labor. To keep inspired, check out other beverage recipes at Allrecipes.
Ingredients for Crafting 1-Gallon Mead
Now that we’ve covered the simplicity of the equipment needed, let’s turn our attention to the Mead Recipe Ingredients. Remember, the magic of mead-making lies in the quality of what you put into it. So, how do you choose the right honey for mead and what else goes into creating that perfect mead flavor? Let’s dive in and explore the essentials!
Finding the Sweet Spot: Honey Varieties
First and foremost, honey is the heart of mead. The type of honey you choose will significantly influence your mead’s character. Do you prefer a rich, bold flavor or something light and floral? Local, raw honey often provides the most nuanced Mead Flavoring Options. However, don’t be afraid to experiment with different varieties to find your personal sweet spot!
Essential Mead Recipe Ingredients:
- Honey: About 2-3 pounds for a 1-gallon batch (the more, the sweeter).
- Water: Quality matters here. Use spring or distilled water for the best results.
- Yeast: Wine yeast is commonly used, but there are specific strains for mead too.
- Nutrients: Yeast nutrients help ensure a healthy fermentation process.
Considering water quality is crucial. After all, mead is mostly water! Poor quality water can introduce off-flavors, so opt for the best you can get. Are you ready to add some personality to your brew? Additional ingredients like fruits, spices, and herbs can be used to create an array of Mead Flavoring Options. From classic orange peel and cinnamon to adventurous additions like chili peppers, the world of mead welcomes creativity.
With these ingredients at hand, you’re well on your way to crafting a mead that’s uniquely yours. Stay tuned as we move on to the process of combining these elements to start the magical transformation into mead.

Step-by-Step Guide to Making Mead
Now that we’ve got our ingredients ready, let’s dive into the How to Make Mead process. Are you excited? Because I sure am! First things first, cleanliness is next to meadliness. Let’s get started by making sure our equipment is pristine.
Sanitizing Your Equipment
Before we embark on our Home Brew Mead Steps, it’s crucial to sanitize everything that will come into contact with your mead. This means buckets, spoons, fermenters, airlocks, and bottles. You can use a no-rinse sanitizer from a homebrew shop, or a diluted bleach solution. Remember, any unwanted bacteria can spoil your batch, so don’t skip this step!
- Prepare the Must: In a large pot, gently warm your honey with some water. This helps it mix better. Aim for a ratio of about 1 part honey to 4 parts water. Stir until fully dissolved.
- Pitch the Yeast: Once the must is cool to touch (around 70°F), transfer it to your fermentation vessel. It’s time to add the yeast, but do it gently—you’re not making bread here, so no need to knead!
- Seal and Store: Seal your vessel with an airlock to keep oxygen out and let carbon dioxide escape. Store it in a dark place with a consistent temperature. The back of a closet or a basement are great spots.
With your mead safely tucked away, let’s talk about the Mead Fermentation Process. This is where the magic happens, and your patience is tested. Fermentation can take anywhere from a few weeks to several months, depending on the strength and sweetness you’re aiming for.
- Monitor Fermentation: Keep an eye on the airlock for bubbling, which indicates active fermentation. After the bubbling slows down (usually after a few weeks), it’s time to check the gravity with a hydrometer to ensure fermentation is complete.
- Rack if Necessary: If there’s a lot of sediment, you might need to transfer, or “rack”, the mead into a clean vessel to clarify.
- Bottle Your Mead: Once fermentation is complete and your mead is clear, it’s time to bottle. Sanitize your bottles and siphon the mead into them, being careful to leave the sediment behind.
Remember, the key to great mead is patience. Don’t rush the process, and you’ll be rewarded with a delightful home brew. Have any questions as you go? Feel free to ask in the comments below. Happy brewing!
Serving and Storing Mead
Now that you’ve mastered the art of crafting your own mead using our step-by-step guide, let’s pivot to the equally important aspects of serving and storing your homemade elixir. Remember, the key to a successful mead starts with sanitizing equipment before you begin the brewing process. This ensures that your mead recipe ingredients interact perfectly without any unwanted microbial guests.
Once your mead has been lovingly prepared, the fermentation process begins. This is where the magic happens! But how can you tell if everything is going as planned? Here’s a detailed walkthrough:
Fermentation: The Heartbeat of Mead Making
During fermentation, your mead will bubble and brew, transforming honey for mead into a delightful alcoholic beverage. In the early stages, it’s essential to keep an eye on the airlock activity. Are you seeing regular bubbles? That’s a good sign! It means the yeast is hard at work. As the fermentation slows, the bubbles will become less frequent. This is normal and indicates that your mead is nearing completion.
But don’t rush it! Patience is a virtue in mead making. Depending on your mead flavoring options, the fermentation can take anywhere from a few weeks to several months. Monitoring the specific gravity with a hydrometer will give you a reliable indication of the mead’s progress. When the readings stabilize over a few days, fermentation is likely complete.
When it’s time to serve, mead can be enjoyed chilled or at room temperature, depending on your preference. Storing your mead is simple: keep it in a cool, dark place, and it can last for years, maturing in flavor as it ages. Just like a fine wine, your mead will evolve, offering new taste experiences over time. Have you thought about the exciting flavors you’ll try next?

Pro Tips for Perfecting Your Mead Recipe 1 Gallon Batch
- Start with quality honey; its flavor is the soul of your Homemade Drinks.
- Furthermore, use spring water to avoid chlorine affecting the fermentation.
- Moreover, aerate your must well before pitching the yeast for a healthy start.
- Also, maintain a consistent temperature to ensure steady fermentation.
- Additionally, be patient; mead benefits from aging, so resist the urge to drink it early.
- Finally, take meticulous notes – every batch is a learning opportunity for perfecting your craft.
Mead Making FAQ
After diving into some pro tips, let’s tackle some of the most burning questions you might have about mead making. Whether you’re a beginner or a seasoned brewer, understanding the ins and outs of this ancient craft can take your mead to the next level. So, let’s get into it!
Popular Mead Making Questions
What are some Mead Ingredient Substitutes for those with specific dietary needs?
If you’re avoiding certain ingredients due to allergies or dietary preferences, fear not! For honey, vegans can use agave nectar or malt extract, though the end product will technically no longer be mead. Gluten-free brewers can replace wheat-based additives with gluten-free options like buckwheat honey or sorghum syrup. Always ensure your yeast and any other additives are compatible with your dietary requirements.
How can I go about Saving Money on Mead ingredients?
Mead can be as economical or as extravagant as you make it. To save money, buy honey in bulk from local beekeepers, which can also add a delightful regional character to your mead. Utilize seasonal fruits and herbs that you can forage or grow yourself. Also, consider reusing yeast from a previous batch, and don’t shy away from asking for discounts at your local homebrew shop for bulk purchases.
What are some common Mead Making Troubleshooting tips?
Stuck fermentation is a common issue where the yeast stops converting sugars into alcohol. This can often be fixed by ensuring the temperature is within the yeast’s optimal range or by adding yeast nutrients. If your mead is too sweet, it might need more time to ferment, or you may need to pitch more yeast. For off-flavors, time is your friend; aging your mead can significantly improve its taste.
Homemade Drinks Questions
What’s the best way to sterilize equipment for making homemade drinks?
Proper sanitation is crucial to avoid contamination. Use a no-rinse sanitizer designed for brewing equipment. Follow the instructions carefully, making sure to cover all surfaces that will come into contact with your mead or other homemade drinks.
Can I use tap water for making mead or other fermented beverages?
While tap water is convenient, it can contain chlorine and other chemicals that may affect the taste of your mead. Using filtered or spring water can yield a purer flavor profile. However, if tap water is your only option, let it sit out overnight to allow some of the chlorine to evaporate, or use a water treatment product to neutralize unwanted chemicals.
For a step-by-step guide on making a gallon of mead, check out this fantastic resource. Happy brewing!


