Glow Recipe Toner PNG: Unlock Radiant Skin Secrets
Have you ever wondered how to achieve that elusive, radiant glow? The secret might just lie in a bottle of glow recipe toner png. This innovative product promises to unlock the secrets to radiant skin, but does it deliver? Let’s dive into the world of skincare and discover the truth behind this popular product.
In this recipe:
- Unlocking radiant skin secrets
- Exploring the benefits of glow recipe toner png
- How to incorporate it into your skincare routine
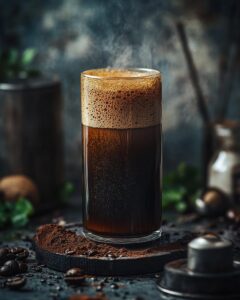
Firstly, achieving glowing skin isn’t just a dream. With the right products and routine, it’s entirely possible. Among those products, the glow recipe toner png stands out. It’s designed to hydrate, soothe, and brighten your complexion. Moreover, it’s packed with ingredients known for their effectiveness. But, how do you make it a part of your daily skincare? It’s simpler than you think.
Additionally, for those curious about similar products, our exploration doesn’t end here. We’ve also delved into Glow Recipe Watermelon Dew Drops Dupe: Unveil Radiance. This read offers insights into another product capable of transforming your skin’s appearance.
In conclusion, finding products that truly benefit your skin can be a game-changer. The glow recipe toner png is one such product. By incorporating it into your routine, you’re on your way to achieving the radiant skin you’ve always wanted.

Who Can Make Glow Recipe Watermelon Toner
Ever thought about creating your own best toner for glowing skin? Whether you’re a DIY skincare enthusiast or a novice, making the Glow Recipe Watermelon Toner at home is within reach. The beauty of a DIY skincare routine lies in its simplicity and the personal touch you can add. So, yes, anyone from beginners to experts can craft this toner.
But first, what do you need? The essentials are surprisingly accessible:
- A clean workspace
- High-quality, skin-safe ingredients
- Precision in measurement tools
- Sterilized containers for storage
With these in hand, you’re set to begin.
Safety First: Best Practices in DIY Skincare
Before diving into your DIY skincare routine, let’s talk safety. Handling skincare ingredients requires care. Always wear gloves and, if possible, a mask. This protects both you and your concoction. Also, ensure your workspace is clean to prevent contamination.
Now, how to use this homemade glow recipe toner? Like its commercial counterpart, apply it after cleansing. Dab it gently on the skin, avoiding the eyes. For best results, follow up with your favorite moisturizer. Remember, consistency is key in any skincare routine for that best toner for glowing skin effect.
So, who can make Glow Recipe Watermelon Toner? Anyone with a passion for skincare and a bit of patience. Whether you’re aiming to replicate the store-bought glow recipe toner or just want to experiment with a DIY skincare routine, the process is rewarding. Plus, it’s a step towards understanding what goes onto your skin.
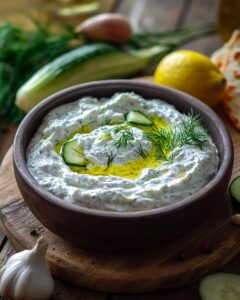
Ingredients Needed for Glow Recipe Watermelon Toner
Now that we’ve covered the minimal equipment needed, let’s dive into the heart of our glow recipe toner: the ingredients. Choosing the right ingredients is crucial for the perfect outcome. After all, the quality of the ingredients directly affects the effectiveness of your toner. So, are you ready to explore what makes this toner a hydrating moisturizer for dry skin and a must-have in your skincare routine?
What Makes the Magic Happen?
Watermelon Extract: The star of the show, watermelon extract, is rich in vitamins and antioxidants. It hydrates and soothes the skin, making it a perfect base for our glow recipe toner. Including watermelon extract in skincare is a game-changer for its refreshing and revitalizing properties.
Witch Hazel: Known for its astringent properties, witch hazel helps in reducing skin inflammation and minimizing pores. It’s a natural ingredient that enhances the skin’s appearance, making it look clearer and more radiant.
Rose Water: This ingredient is not just for its pleasant fragrance. Rose water has anti-inflammatory properties that can help reduce redness and calm the skin. It’s also incredibly hydrating, making it an excellent addition to any hydrating moisturizer for dry skin.
Aloe Vera Gel: Aloe vera is a powerhouse of hydration. It soothes and moisturizes the skin, providing relief to dry and irritated skin. Its healing properties also help in skin regeneration.
Glycerin: A humectant that attracts moisture to the skin. Glycerin is key for keeping the skin hydrated, plump, and soft throughout the day.
For sourcing quality ingredients, consider visiting local health stores or online marketplaces that specialize in organic and natural skincare formulations. Remember, the purity of your ingredients can significantly impact the efficacy of your glow recipe toner.

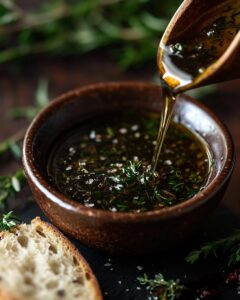
Step-by-Step Guide to Making Glow Recipe Watermelon Toner
Now that we’ve got all our ingredients ready, let’s dive into the exciting part – making our very own glow recipe toner DIY! Preparing this toner for clear skin is not only fun but also a great addition to your skincare routine with toner. Ready to get started?
First things first, let’s prepare our workspace. Ensure it’s clean and you have all your ingredients and tools within reach. This step is crucial for a smooth process and to prevent any contamination.
Mixing It All Together
Begin by taking the watermelon extract. This powerhouse ingredient is what gives our toner that hydrating and glowing boost. Pour it into a clean bowl. Next, add in the witch hazel. It’s great for toning and soothing the skin. Now, for a touch of hydration, mix in the hyaluronic acid.
Stir the mixture gently but thoroughly. You want to make sure everything blends well. This step is key for the effectiveness and stability of your glow recipe toner DIY. After mixing, let’s not forget the importance of pH testing. Our skin’s health is paramount, so we need to ensure the toner’s pH is suitable. Use pH strips to test and adjust if necessary. You might need to add a bit more witch hazel or distilled water to get it just right.
Once you’re happy with the pH level, your toner for clear skin is almost ready. Pour it into a sterilized bottle. And there you have it, your very own skincare routine with toner addition, ready to use!
Remember, incorporating this toner into your daily skincare routine can help refresh, hydrate, and prep your skin for the next steps in your regimen. Plus, making it yourself adds that personal touch and ensures you know exactly what’s going on your skin. Enjoy the glow!
Serving and Storing Ideas and Tips
Now that we’ve walked through making your very own glow recipe toner, let’s dive into the best ways to serve and store it. After all, we want our homemade skincare to stay as fresh and effective as possible, right? Whether you’re a skincare aficionado or a newbie, these tips will ensure your toner remains potent and safe for use.
Ensuring Effectiveness and Stability
First things first, let’s talk about preparation. Before mixing your ingredients, ensure your workspace is clean and organized. This not only helps in making the process smoother but also prevents contamination. Have you ever thought about the importance of a clean environment in skincare?
When mixing and blending your glow recipe toner, consistency is key. This step ensures that all the beneficial components are evenly distributed. Remember, a well-mixed toner means a more effective product. And who doesn’t want that?
Now, onto pH testing. This might sound scientific, but it’s simpler than you think. Testing and adjusting the pH of your toner is crucial for skin safety. A pH that’s too high or too low can irritate your skin. So, grab a pH strip and aim for a skin-friendly range. This step can make or break your homemade skincare product.
When it comes to serving glow recipe toner, consider transferring it into a smaller container, like a glow recipe toner mini bottle. This not only makes application easier but also ensures you’re not exposing the entire batch to air every time you use it. Plus, it’s travel-friendly!
As for storing homemade skincare, always opt for a cool, dark place. Light and heat can degrade the quality of your toner. Think of it as keeping your skincare in a mini safe, away from the elements that can reduce its efficacy.
By following these simple yet effective tips, you’ll ensure your homemade glow recipe toner remains as potent and beneficial as when you first made it. Happy mixing!

Pro Tip: Enhancing Your Glow Recipe Watermelon Toner Experience
- Initially, choose a high-quality glow recipe toner png for inspiration.
- Moreover, always perform a patch test before incorporating it into your routine.
- Furthermore, integrate the toner gently to avoid skin irritation.
- Additionally, keep the toner in a cool, dark place to preserve freshness.
- Importantly, shake well before each use to mix the natural ingredients.
- Lastly, consider using cotton pads for application to ensure even coverage.
FAQ – Ingredient Replacements and Money-Saving Tips
Have you been curious about making your own Glow Recipe Watermelon Toner but worried about the glow recipe toner price or finding the right toner ingredient replacement options? Or perhaps you’re on the hunt for money savings options in skincare? Well, you’ve come to the right place! Let’s dive into some of your most pressing questions.
DIY Glow Recipe Toner Q&A
Q: What can I use if I’m allergic to watermelon extract?
A: No worries! Cucumber extract is a fantastic alternative. It’s gentle, hydrating, and has soothing properties similar to watermelon extract. Perfect for sensitive skin!
Q: Is there a cheaper alternative to PHA and BHA for the toner?
A: Absolutely! While PHA and BHA are great for exfoliation, lactic acid can be a more budget-friendly option. It’s effective yet gentle on the skin, making it a great substitute.
Q: How can I reduce the overall cost of making this toner?
A: To save money, start by purchasing ingredients in bulk. Also, consider making larger batches to cut down on the cost per use. Plus, homemade toners can be great gifts!
For more details on the Glow Recipe Watermelon Toner, including price and size options, visit Glow Recipe.
Remember, skincare is all about what works for you. Don’t be afraid to experiment with different ingredients to find your perfect match. Happy mixing!