Dead Dough Recipe Secrets Unveiled: How to Sculpt Your Bakes to Perfection
- Uncover the dead dough recipe secrets
- Learn sculpting techniques for your bakes
- Step-by-step guide to creating edible art
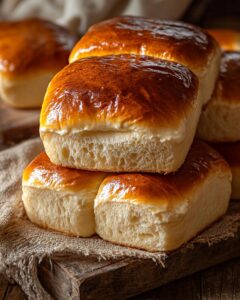
Firstly, understanding the right ingredients is crucial. Unlike regular dough, dead dough requires a specific balance to maintain its shape while being entirely edible. Here, precision is key. Additionally, we’ll dive into the essential tools every baker needs to start sculpting. From simple shapes to complex designs, we’ve got you covered.
Moreover, for those seeking to elevate their baking game, exploring different coloring techniques will add that wow factor to your creations. It’s not just about the shape; it’s also about bringing your sculptures to life with vibrant colors. With these skills, your bakes will not only be a feast for the stomach but for the eyes too.
While we’re on the subject of elevating your baking skills, don’t miss our guide on baking tips for beginners. It’s a treasure trove of information that complements what you’ll learn today.
So, let’s get started. Follow this guide, and soon, you’ll be crafting bakes that are too beautiful to eat – almost. Welcome to the world of dead dough sculpting!

Who Can Make Dead Dough: Unveiling Accessibility and Requirements
So, who can actually dive into the world of dead dough sculptures? Is it a culinary Everest reserved for the seasoned baker, or can anyone with a whisk and a dream take it on? The truth is, creating with dead dough is surprisingly accessible. Whether you’re a beginner looking for an easy dead dough recipe or someone more experienced aiming to craft complex sculptures, there’s a path for you. Let’s break down what you need to know to start your journey into the art of dead dough.
Understanding the Skill Level
Firstly, it’s important to note that while intricate dead dough sculptures might look intimidating, the basic techniques are beginner-friendly. That said, as with any craft, your creations will become more sophisticated with practice. Starting with a dead dough recipe without yeast can simplify the process, making it an excellent entry point for novices. These recipes require minimal ingredients and steps, allowing anyone to try their hand at this unique baking craft.
However, as you move on to dead dough sculptures DIY projects, you might encounter more complex designs that require a steady hand and a bit of creativity. But don’t let this deter you. Remember, every expert was once a beginner. With patience and practice, you’ll soon be crafting your own stunning pieces.
Essential Tools and Equipment
To get started, you’ll need some basic baking tools:
- A rolling pin for flattening your dough
- Various cutters or knives for shaping
- A baking tray for your creations
These tools are likely already in your kitchen, making dead dough an accessible hobby for most. For more detailed projects, specialized sculpting tools can be found online, such as on Amazon.
Finally, it’s crucial to understand that despite its name and appearance, dead dough is not meant for consumption. The focus is on the art and craft of baking, rather than producing edible treats. This safety note is vital, especially when sharing your creations or teaching others.
In conclusion, whether you’re aiming to master an easy dead dough recipe or challenge yourself with intricate sculptures, dead dough crafting is within your reach. With the right tools, a bit of know-how, and a dash of creativity, you’ll be well on your way to creating beautiful, non-edible art that’s sure to impress. For a comprehensive guide to get you started, check out this helpful resource from Baking Savvy.
Gathering Your Ingredients for Dead Dough
Now that we’ve covered the minimal equipment needed, let’s dive into the ingredients. The right ingredients are key to the perfect dead dough. Ever wondered why some sculptures look more polished than others? It often boils down to the quality of ingredients used. So, let’s ensure your creation stands out for all the right reasons.
What You’ll Need
Before we get our hands dirty, let’s make sure you have everything you need. Here’s a comprehensive list for the best dead dough recipe:
- Flour – The backbone of your dough, providing structure.
- Salt – Not just for flavor! It strengthens the dough, making it perfect for sculpting.
- Water – Activates the flour and salt, binding them together.
- Optional: Food coloring or natural dyes for that creative touch.
Each ingredient plays a crucial role. Flour and salt, in particular, are non-negotiable for a simple dead dough recipe. They ensure your sculpture holds its shape and lasts longer. But, don’t just grab any flour or salt off the shelf. For the best results, opt for fine, high-quality flour and pure, non-iodized salt. This little tip can make a big difference in your sculpting projects.
Considering a salt dough recipe for sculpting? Remember, the finer the salt, the smoother your dough. This makes it easier to work with and helps in achieving those intricate details. So, are you ready to mix these ingredients and start crafting? Your best dead dough recipe awaits!

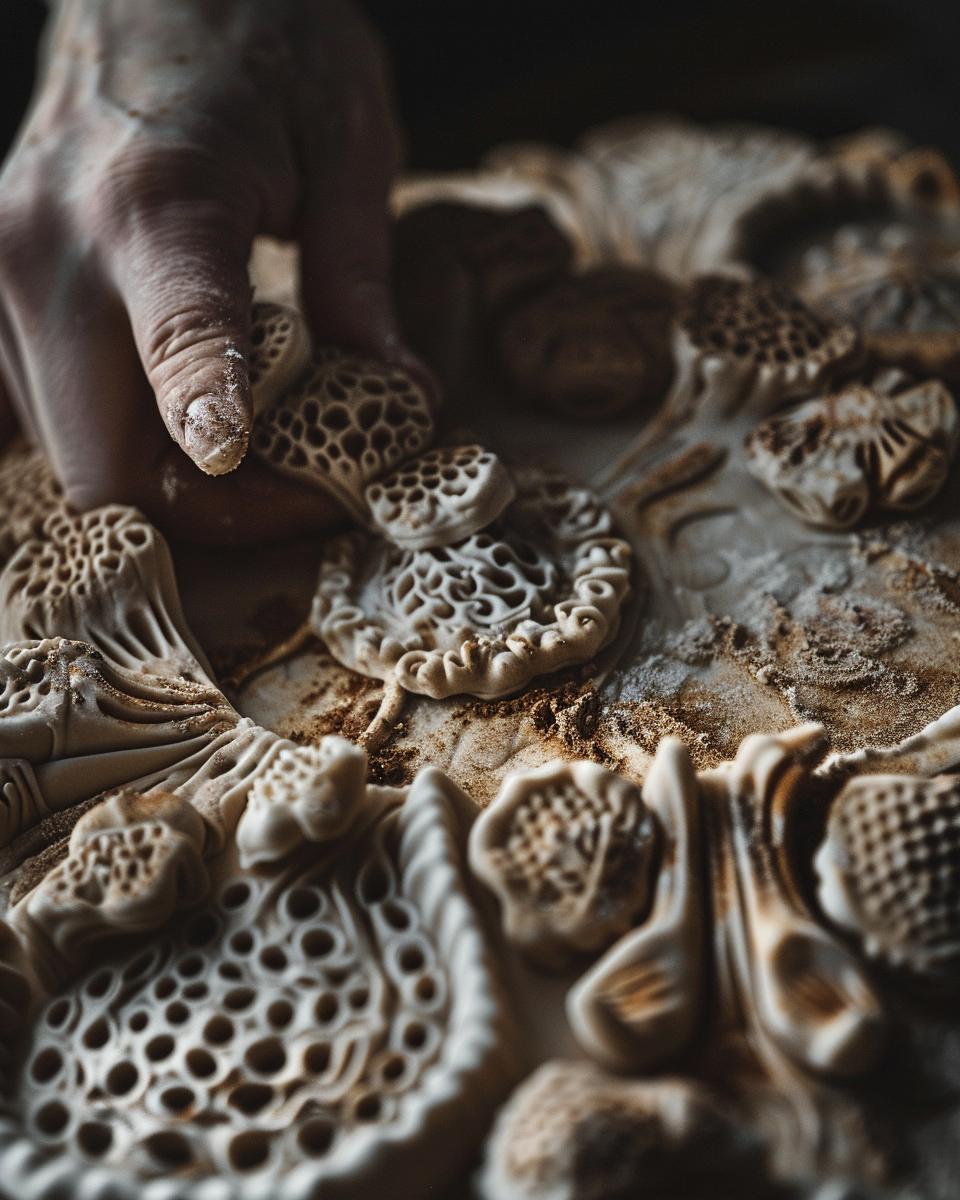
Step-by-Step Guide to Crafting Dead Dough
Now that we’ve got our ingredients ready, let’s dive into how to make dead dough sculptures that will amaze everyone. Trust me, it’s easier than you think, and the results? Absolutely stunning.
First things first, let’s talk about mixing the ingredients. The secret to the perfect dead dough recipe lies in the consistency. You want your dough to be pliable but not sticky. So, how do we achieve that? Begin by slowly adding your water to the flour and salt mixture. It’s all about finding that sweet spot. Too dry? Add a bit more water. Too sticky? Sprinkle in a little more flour. Remember, patience is key here.
Shaping Your Masterpieces
Once your dough feels just right, it’s time to shape your sculptures. This is where you can really let your creativity shine. Are you a beginner? Start with simple shapes like leaves or flowers. For those feeling more adventurous, why not try crafting intricate designs or even characters? The sky’s the limit!
Now, onto coloring and adding finishing touches. Want to know a safe practice for decorating your dead dough creations? Food coloring is your best friend. Mix it with a little water and gently brush it onto your sculptures before baking. This not only adds a pop of color but also brings your creations to life.
Remember, making decorative dead dough recipes is all about experimentation and having fun. So, why not give it a try? Who knows, you might just surprise yourself with what you can create. Happy crafting!
Serving and Storing Dead Dough Creations
Now that you’ve mastered the art of making dead dough, let’s dive into how to showcase and preserve your stunning creations. Whether you’re a beginner or an expert, these tips will ensure your sculptures remain as captivating as the day you made them. So, how do you transition from crafting to displaying and storing these edible artworks?
Perfecting Your Dead Dough Masterpieces
First off, achieving the perfect dough consistency is crucial. Did you find the mixing process straightforward? Remember, the goal is a pliable yet firm dough that holds its shape. Next, shaping your sculptures offers a canvas for creativity. Whether you’re leaning towards simple bread sculpture ideas or intricate dead dough sculptures, the only limit is your imagination. And when it comes to coloring and adding those finishing touches, always opt for food-safe practices. This way, your creations stay not just visually appealing but also entirely safe to display.
But what about after the admiration fades? Is dead dough waterproof? While not entirely waterproof, it holds up well under normal conditions. To extend the lifespan of your sculptures, store them in a cool, dry place. A display case or a shelf away from direct sunlight works wonders. This prevents moisture and heat from softening the dough, keeping your sculptures intact for longer periods.
Lastly, engaging with your creations doesn’t stop at making them. Sharing your dead dough sculptures can inspire others and ignite a passion for edible art. Whether it’s through social media or a display in your home, showcasing your work encourages a community of creators to explore the endless possibilities of dead dough.
In conclusion, serving and storing your dead dough creations properly not only preserves their beauty but also shares a piece of your culinary journey with the world. Ready to create your next masterpiece?

Pro Tip: Mastering Your Dead Dough Recipe
- Firstly, always measure ingredients precisely for consistency.
- Secondly, knead your dough thoroughly to avoid cracks.
- Moreover, let the dough rest before sculpting for easier handling.
- Additionally, use a toothpick to add fine details to your sculptures.
- Remember, dead dough dries quickly; work in small sections.
- Furthermore, seal your finished pieces with a clear varnish for longevity.
- Lastly, store sculptures in a cool, dry place to prevent warping.
FAQ: Enhancing Your Dead Dough Experience
After diving into the pro tips, let’s tackle some of the burning questions you might have about making the most out of your dead dough creations. Whether you’re exploring salt dough alternatives or seeking money savings options in your dead dough recipe, we’ve got you covered!
Top Dead Dough Questions Answered
1. What are some allergy-friendly or cost-effective ingredient substitutions?
For those looking for a salt dough alternative, using rice flour or chickpea flour can be a great option to avoid gluten. To cut costs, consider bulk-buying your primary ingredients or using home-brand versions. These small changes can lead to significant money savings in your dead dough recipe without compromising quality.
2. How can I maximize the longevity of my sculptures with minimal investment?
Sealing your finished pieces with a clear varnish can protect them from moisture and wear, extending their life. Additionally, storing your sculptures in a cool, dry place away from direct sunlight can prevent warping and fading. For more tips on preserving your dead dough creations, check out Baking Savvy’s comprehensive guide.
3. Are there expert tips for troubleshooting common dead dough making challenges?
Yes! If your dough is too sticky, adding a bit more flour can help. Conversely, if it’s too dry, a few drops of water might be all you need. Remember, the consistency of your dough can significantly impact your final product, so don’t hesitate to adjust as needed.
4. What to do with dead dough leftovers?
Get creative! Dead dough leftovers can be repurposed into small decorative items, practice pieces for honing your sculpting skills, or even used as homemade playdough for kids.
5. Where can I find more inspiration for my dead dough projects?
Exploring online galleries, social media platforms, and dedicated baking blogs can spark new ideas. Also, joining community workshops or classes can provide valuable hands-on experience and feedback.